TruckHacks - Ubiquirack ( one rack to rule them all )


One of the things I really wanted for the truck was a rack system to hold mountain bikes, skis, snowboards, and SCUBA tanks. I looked all over the internet and found quite a few nice systems, but the problem was twofold. The first was that none of these systems were integrated in that I could use the same system for all of the stuff I wanted to secure. I really didn't want to have to keep switching in and out all these different racks or have to mess with various mounting points if I wanted to use more than one system at the same time. The second was $$COST$$. Holy cow! To buy three different systems was going to cost me nearly a thousand dollars! It was then that I began my quest to design a ubiquitous rack system that was not only cheap, but could be used, with minor attachments, for all my various gear.
I drew out a good number of various designs, like using the stake pockets to mount a rack into, various boxes, different armature systems (similar to this) etc. The stake pocket design was winning by a longshot until I installed the Putco push-up tie-downs which killed that idea because I didn't want to have to keep removing the tie-downs. The remainder of the ideas I had didn't really do what I wanted. They weren't ubiquitous, required a lot of welding, weren't "sexy" and weren't on the super cheap.
 While
rummaging around in my garage I ran across a piece of weld steel 3/16"
x 1 1/2" x 36" that I had used as a lock bar in my old house for the
door between the outside and the garage. As I looked at it, the
solution to my problem was beginning to form. I could mount it to the
top of the bed rail right behind the cab, on standoffs, and then drill
holes into it at various intervals for u-bolts. Off to Home-Depot I
went to buy a piece that was around 57" in length (the width of my
truckbed liner). When I got to Home Depot, I found what I needed, but
then I spied something even better. I picked up a six foot length of
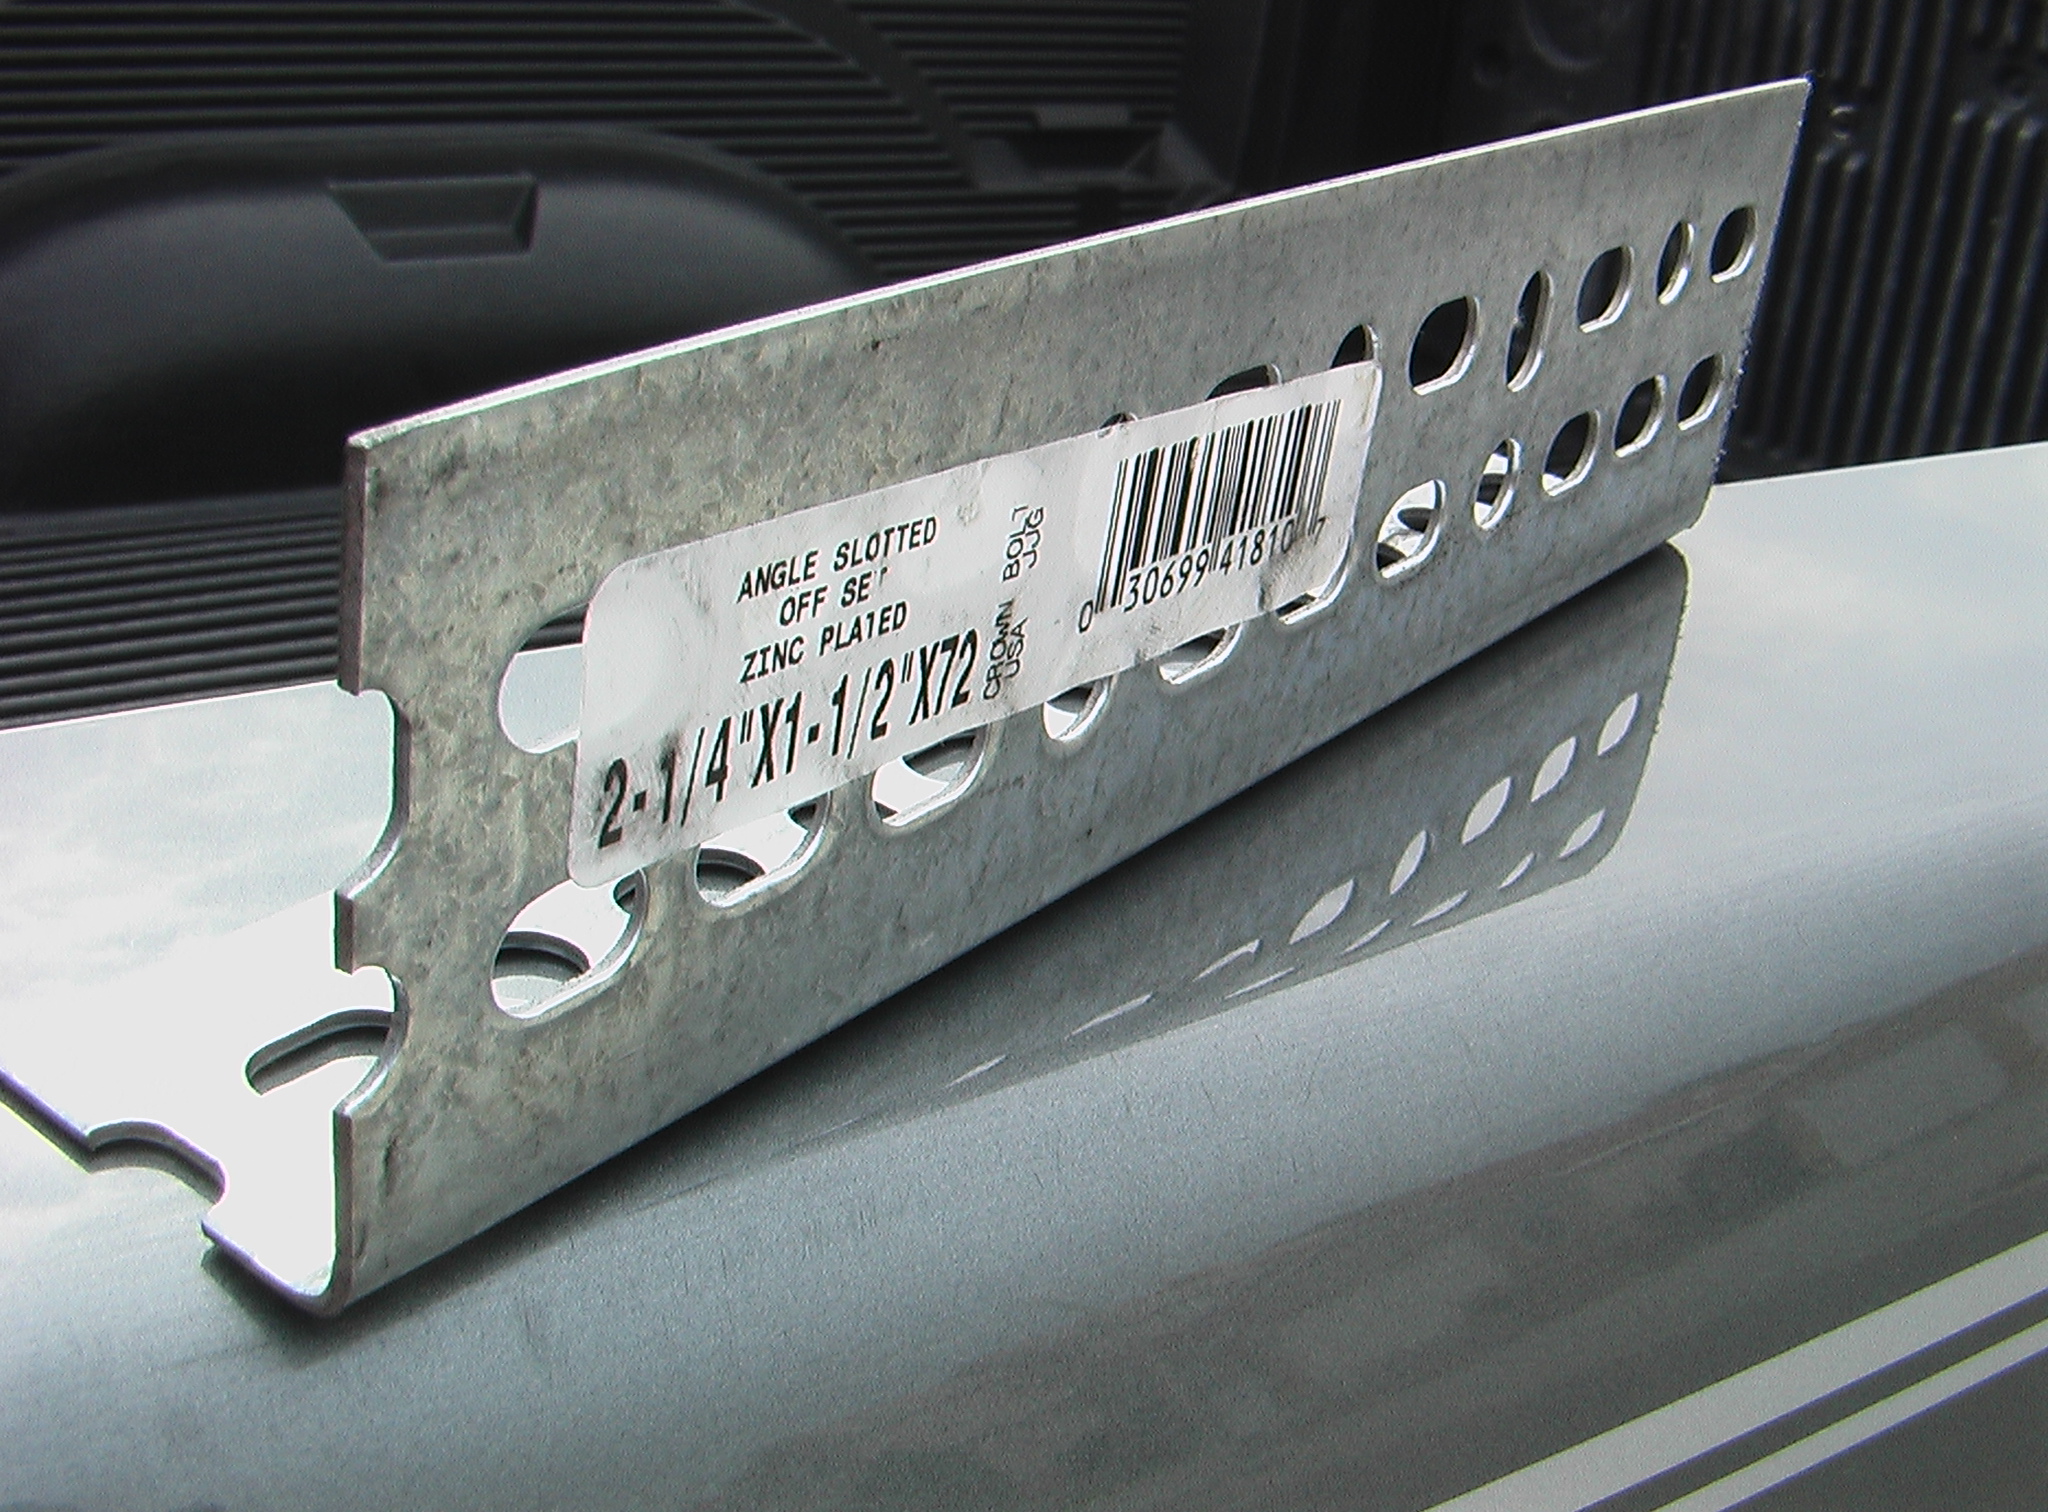
"L" shape Dexion style strut.
While
rummaging around in my garage I ran across a piece of weld steel 3/16"
x 1 1/2" x 36" that I had used as a lock bar in my old house for the
door between the outside and the garage. As I looked at it, the
solution to my problem was beginning to form. I could mount it to the
top of the bed rail right behind the cab, on standoffs, and then drill
holes into it at various intervals for u-bolts. Off to Home-Depot I
went to buy a piece that was around 57" in length (the width of my
truckbed liner). When I got to Home Depot, I found what I needed, but
then I spied something even better. I picked up a six foot length of
"L" shape Dexion style strut.
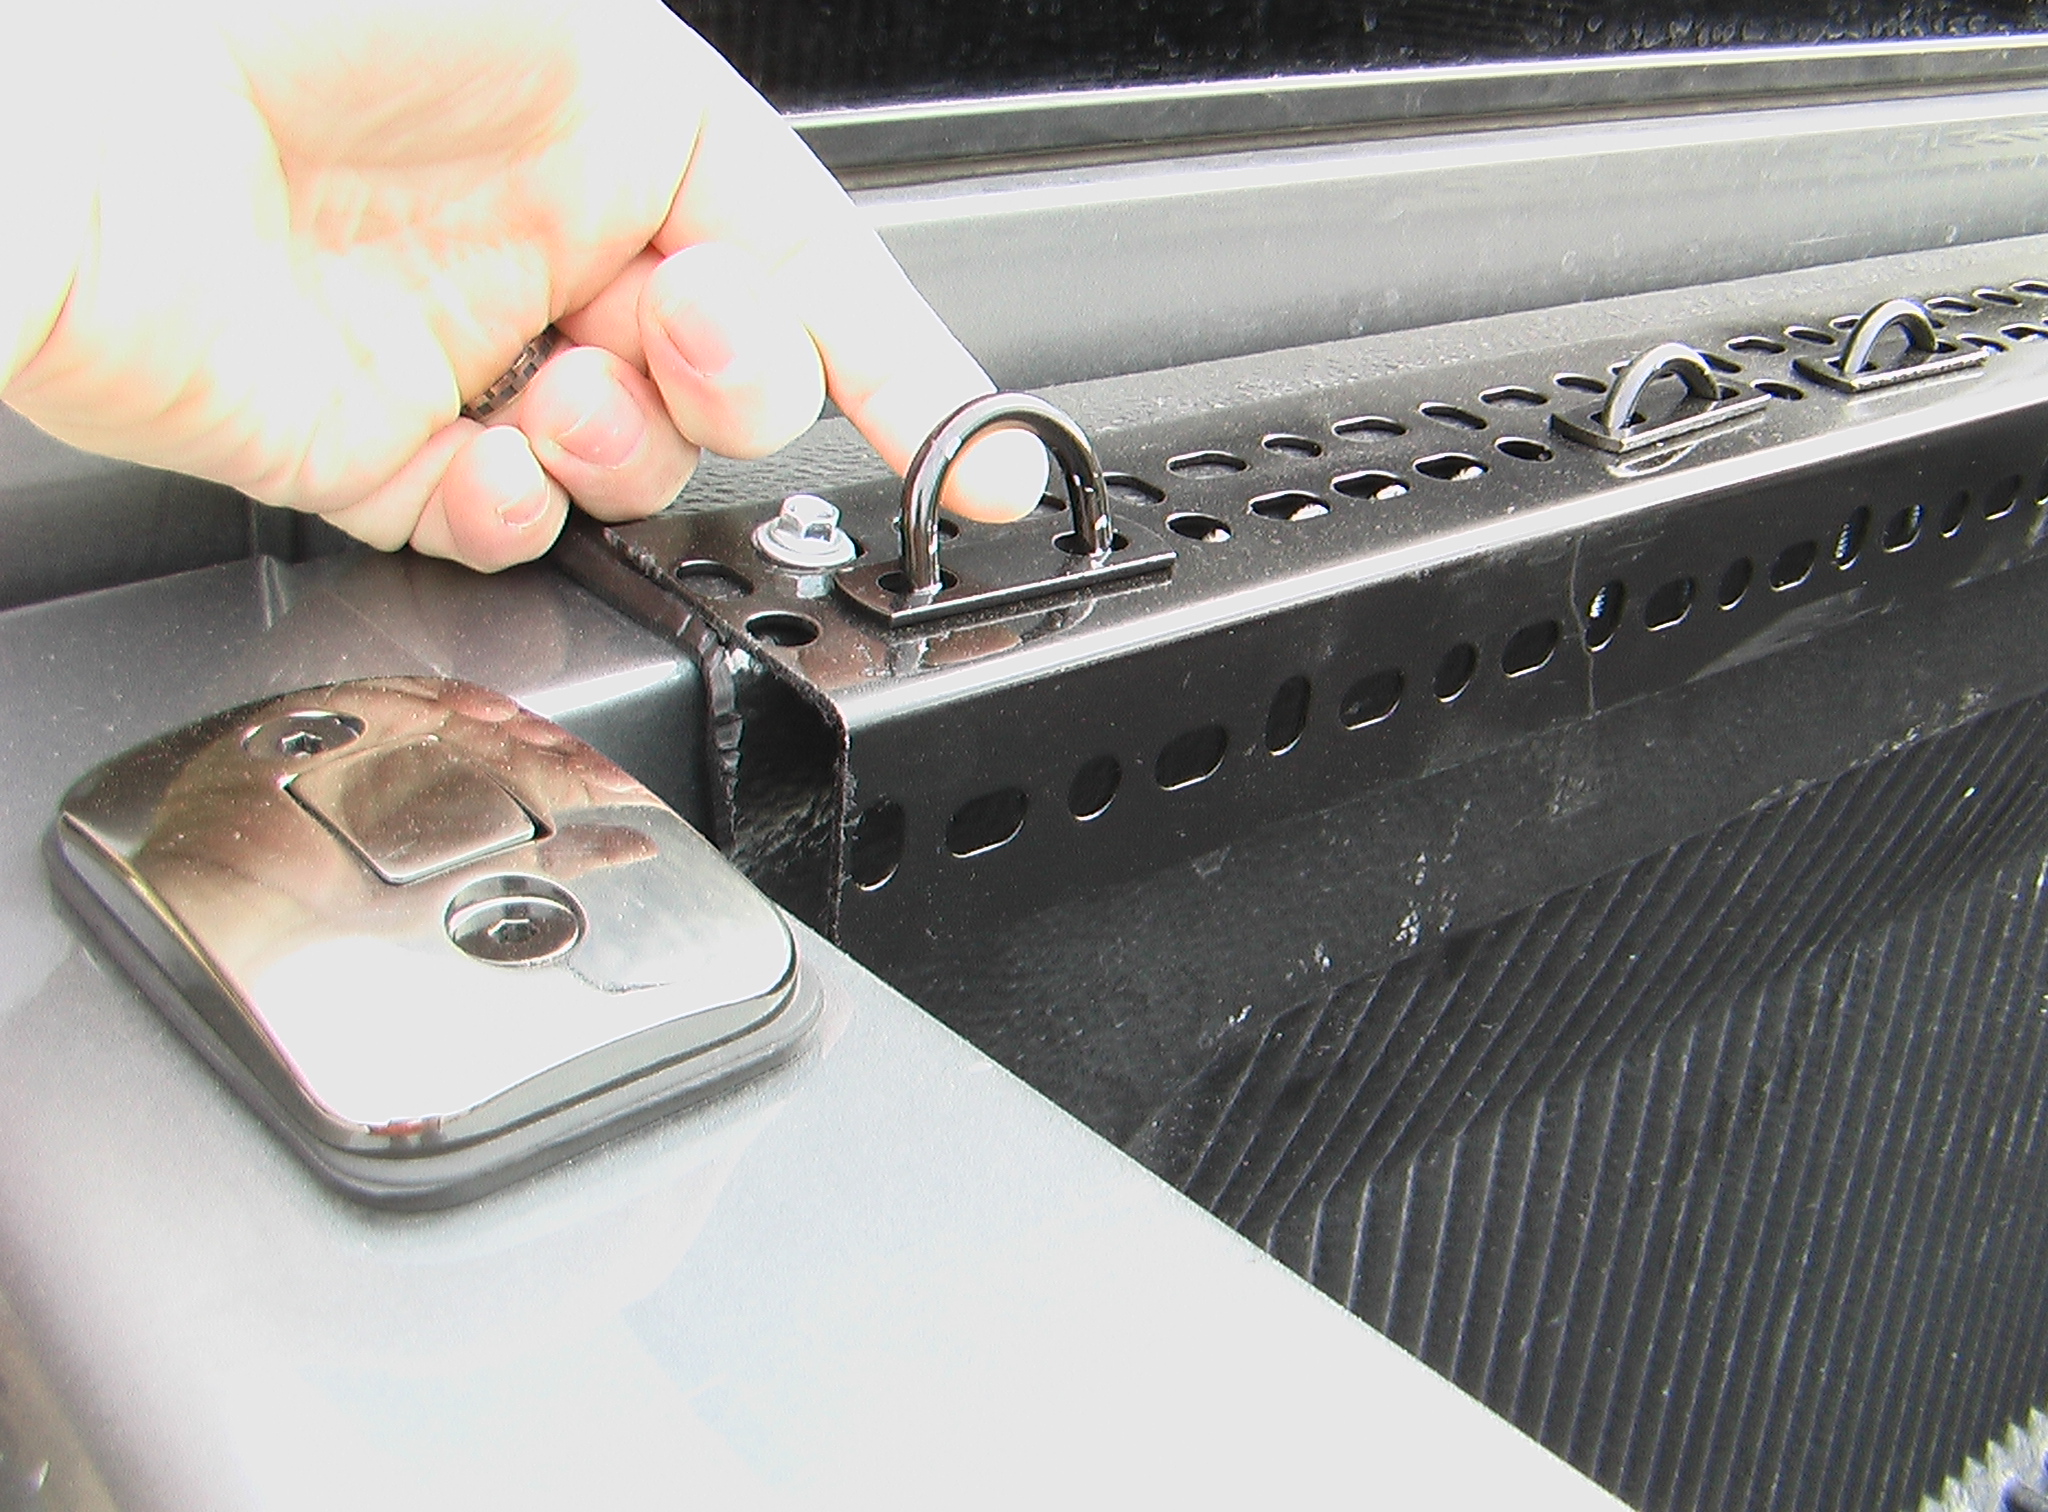
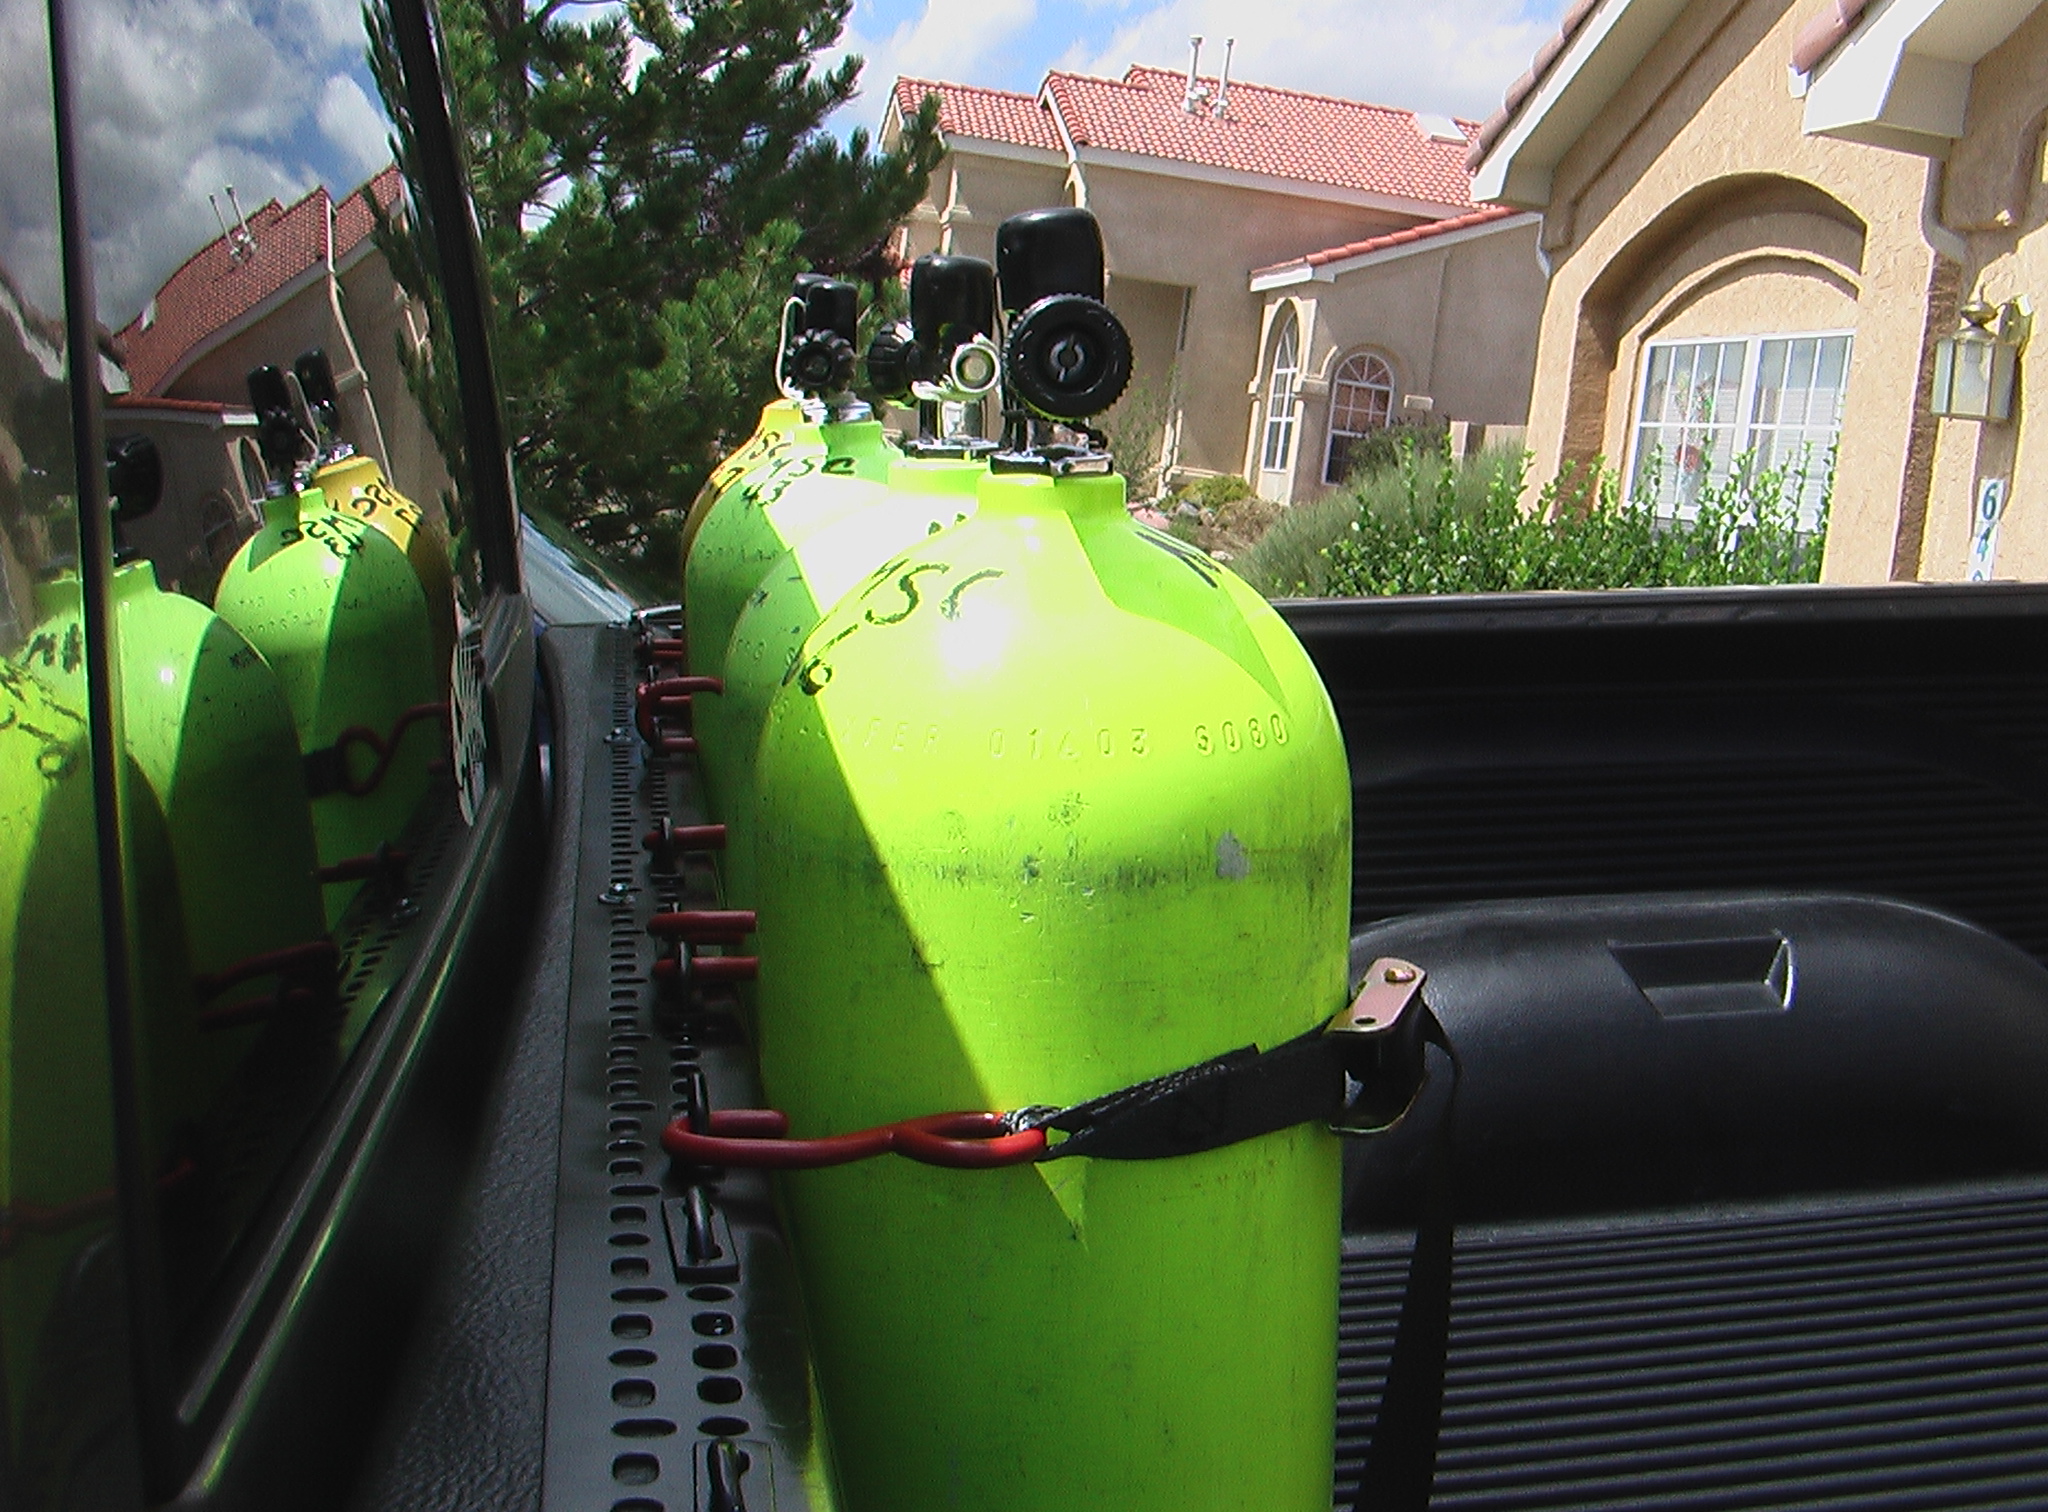
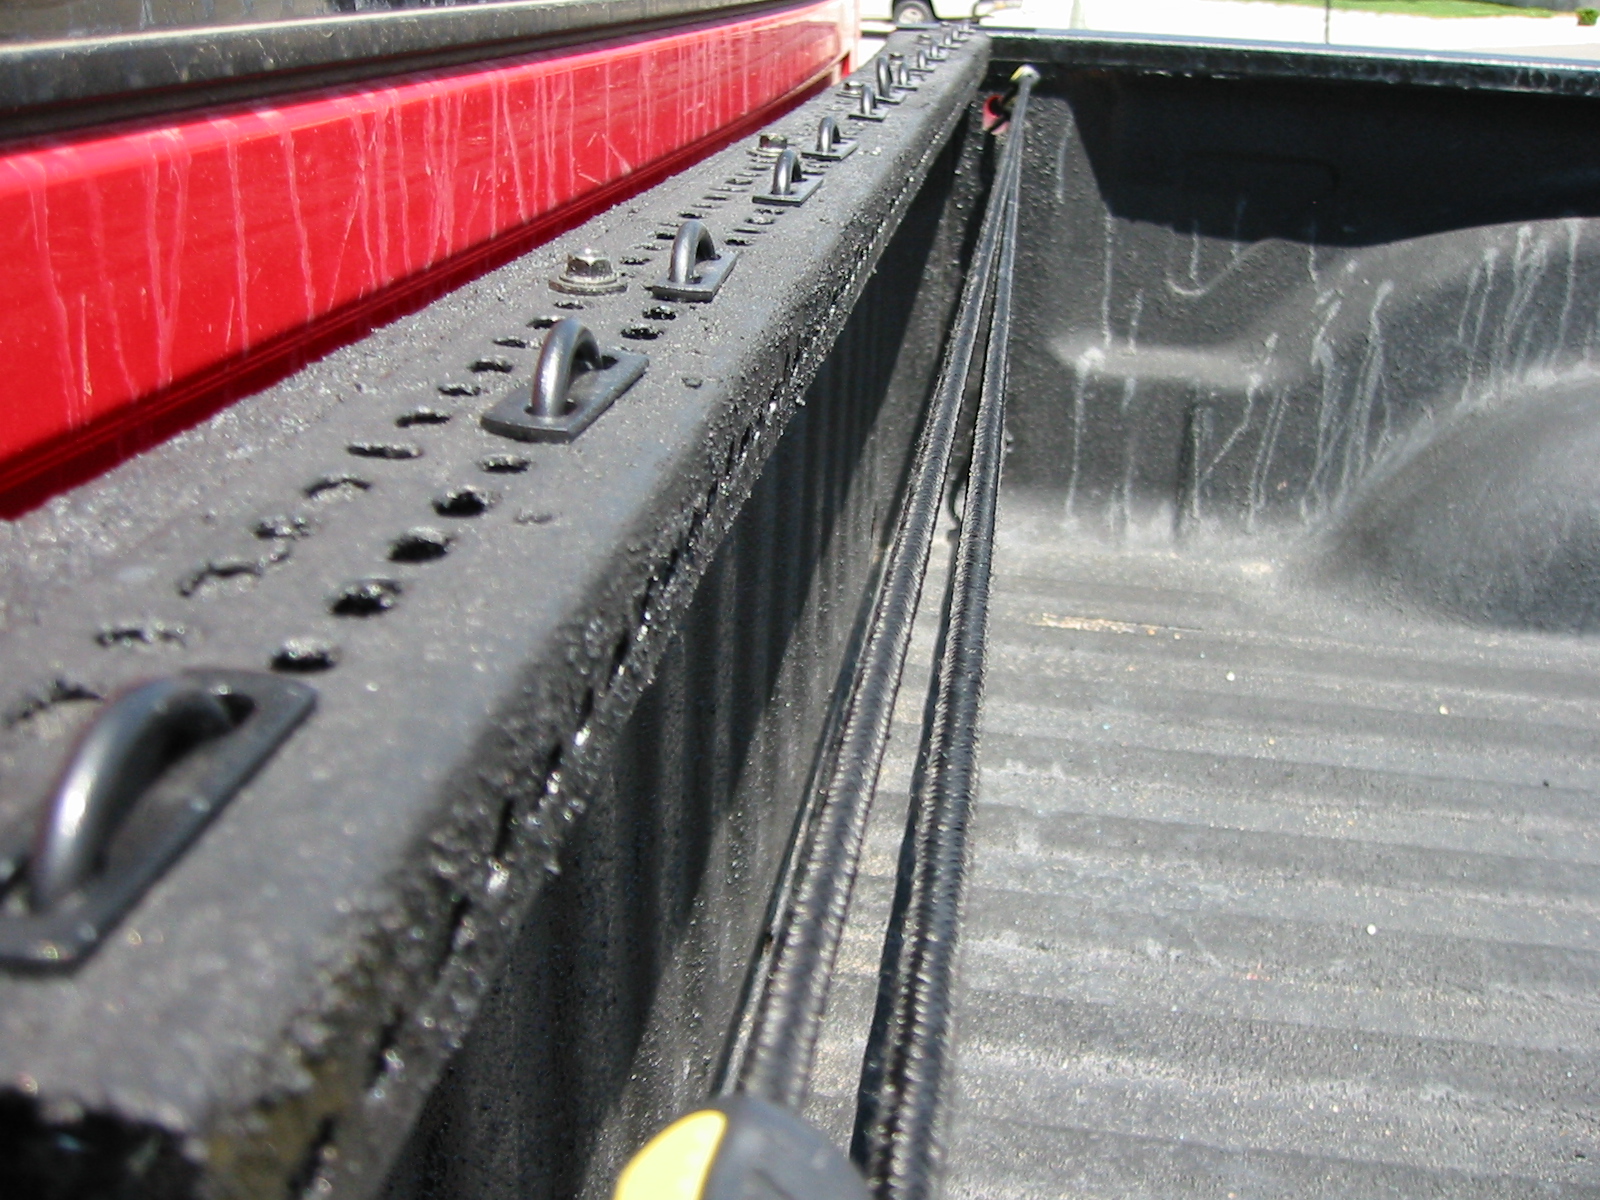
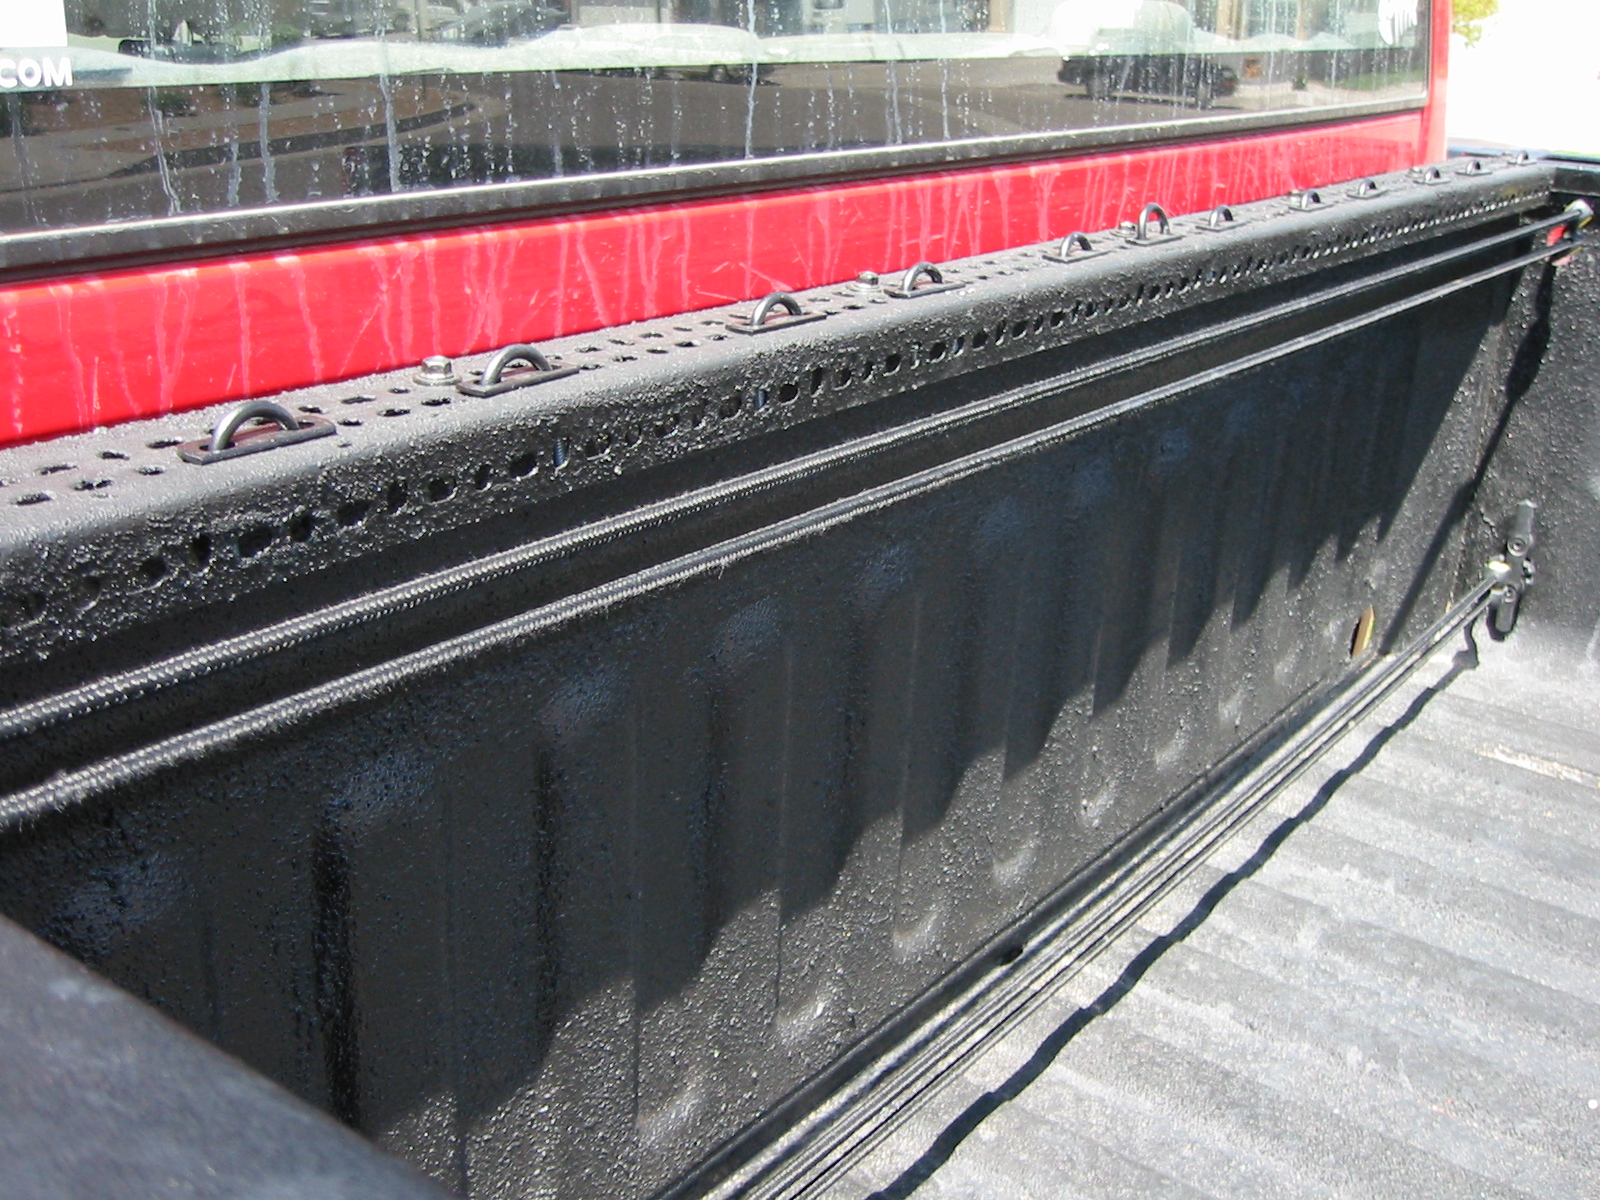
Now we were talking. I could use the topmost set of holes to mount to the bed rail so that the short "L" side lapped over the inside of the bed and I'd have holes both vertically and horizontally that I could use. It was perfect! No having to drill holes like I'd originally planned in the weld steel, I had a horizontal and vertical surface for mounts, the u-bolts were a perfect match, and because of the "L" shape it was very sturdy. I bought 12 u-bolts (two for each SCUBA tank to mount six tanks), a box of 12 self-tapping screws (thanks to Bobby and Peter for suggesting these), and I was off!
The first thing I did was to cut the "L" strut down to 75" and luckily for me the cut ended up being in just the right spot so that the hole pattern was the same from both ends going inward. If you don't cut it so the holes on both ends are the same, it won't be as easy to count groups of holes for spacing the u-bolts in a centered pattern. Next I taped up the threads on all the u-bolts and painted everything black then marked off on the truck bed rail behind the cab where I needed to put the four bolts.
NOTE: Actually go and buy good spraypaint. I used some cheapy black paint I had in the garage and it just didn't hold up (scratching and flaking). I bought some Duplicolor spraypaint and clearcoat and redid the paintjob which is holding up much better.
Now... My truck is a 2005 and in pretty much perfect condition. I was a bit squeamish about drilling holes through my bedliner and the bed rail so I drilled a pilot hole for the self-tapping screws to prevent accidentally skidding on the paint when trying to drill them in. I initially put four bolts in to secure the "L" strut, and after testing it out I plan on putting three more just so it's a bit more secure.
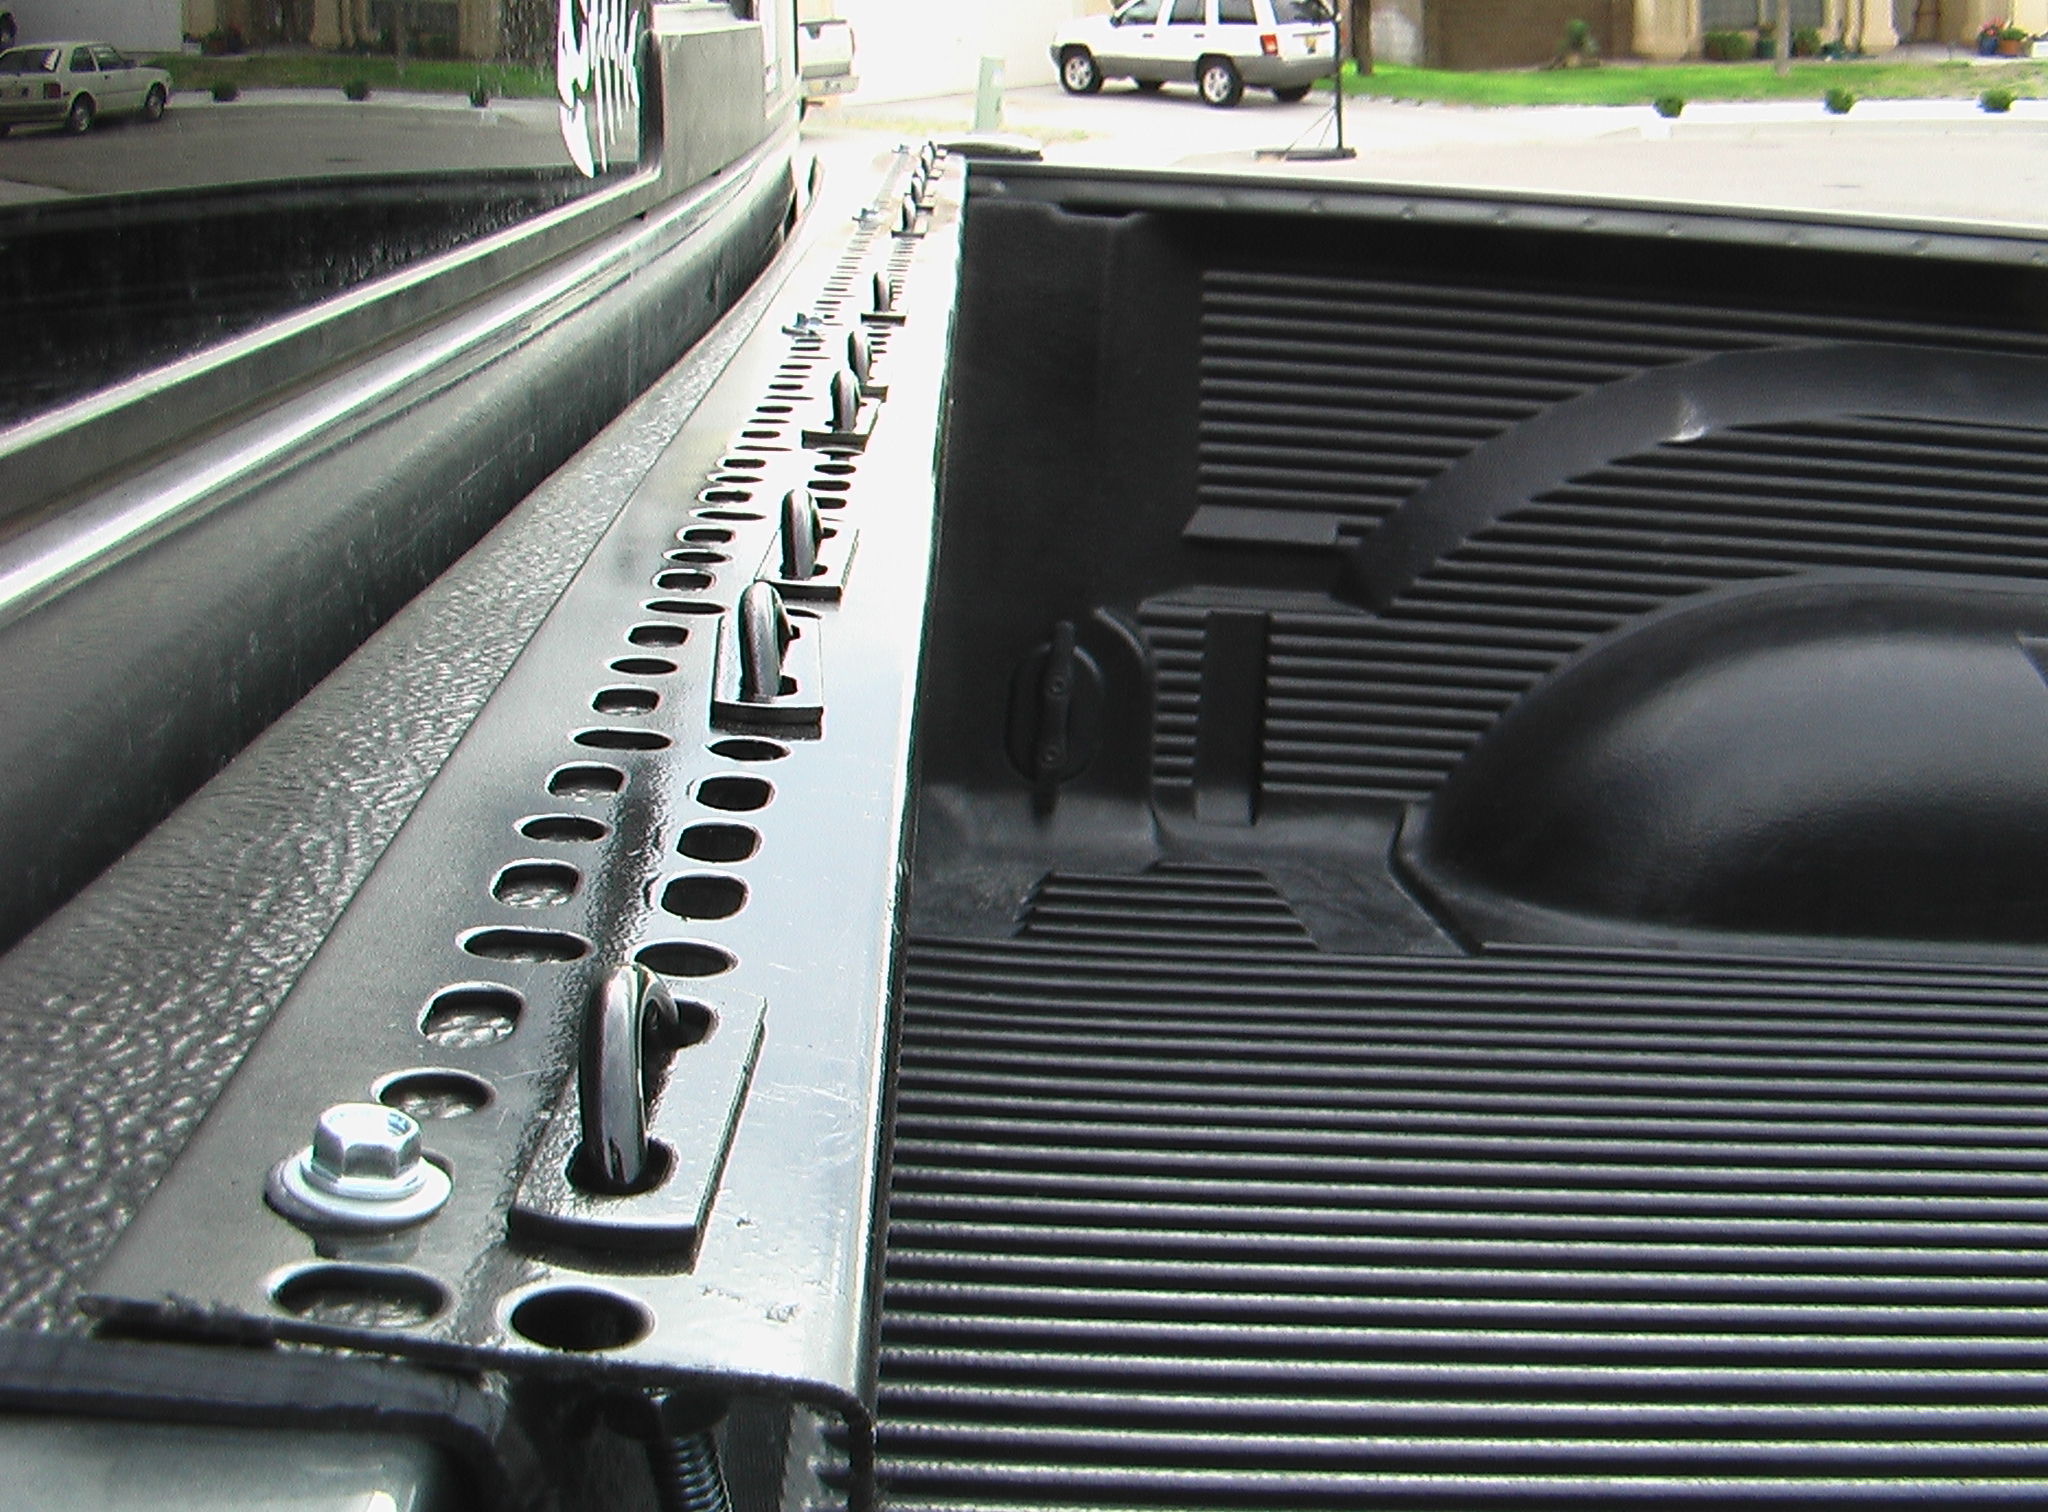
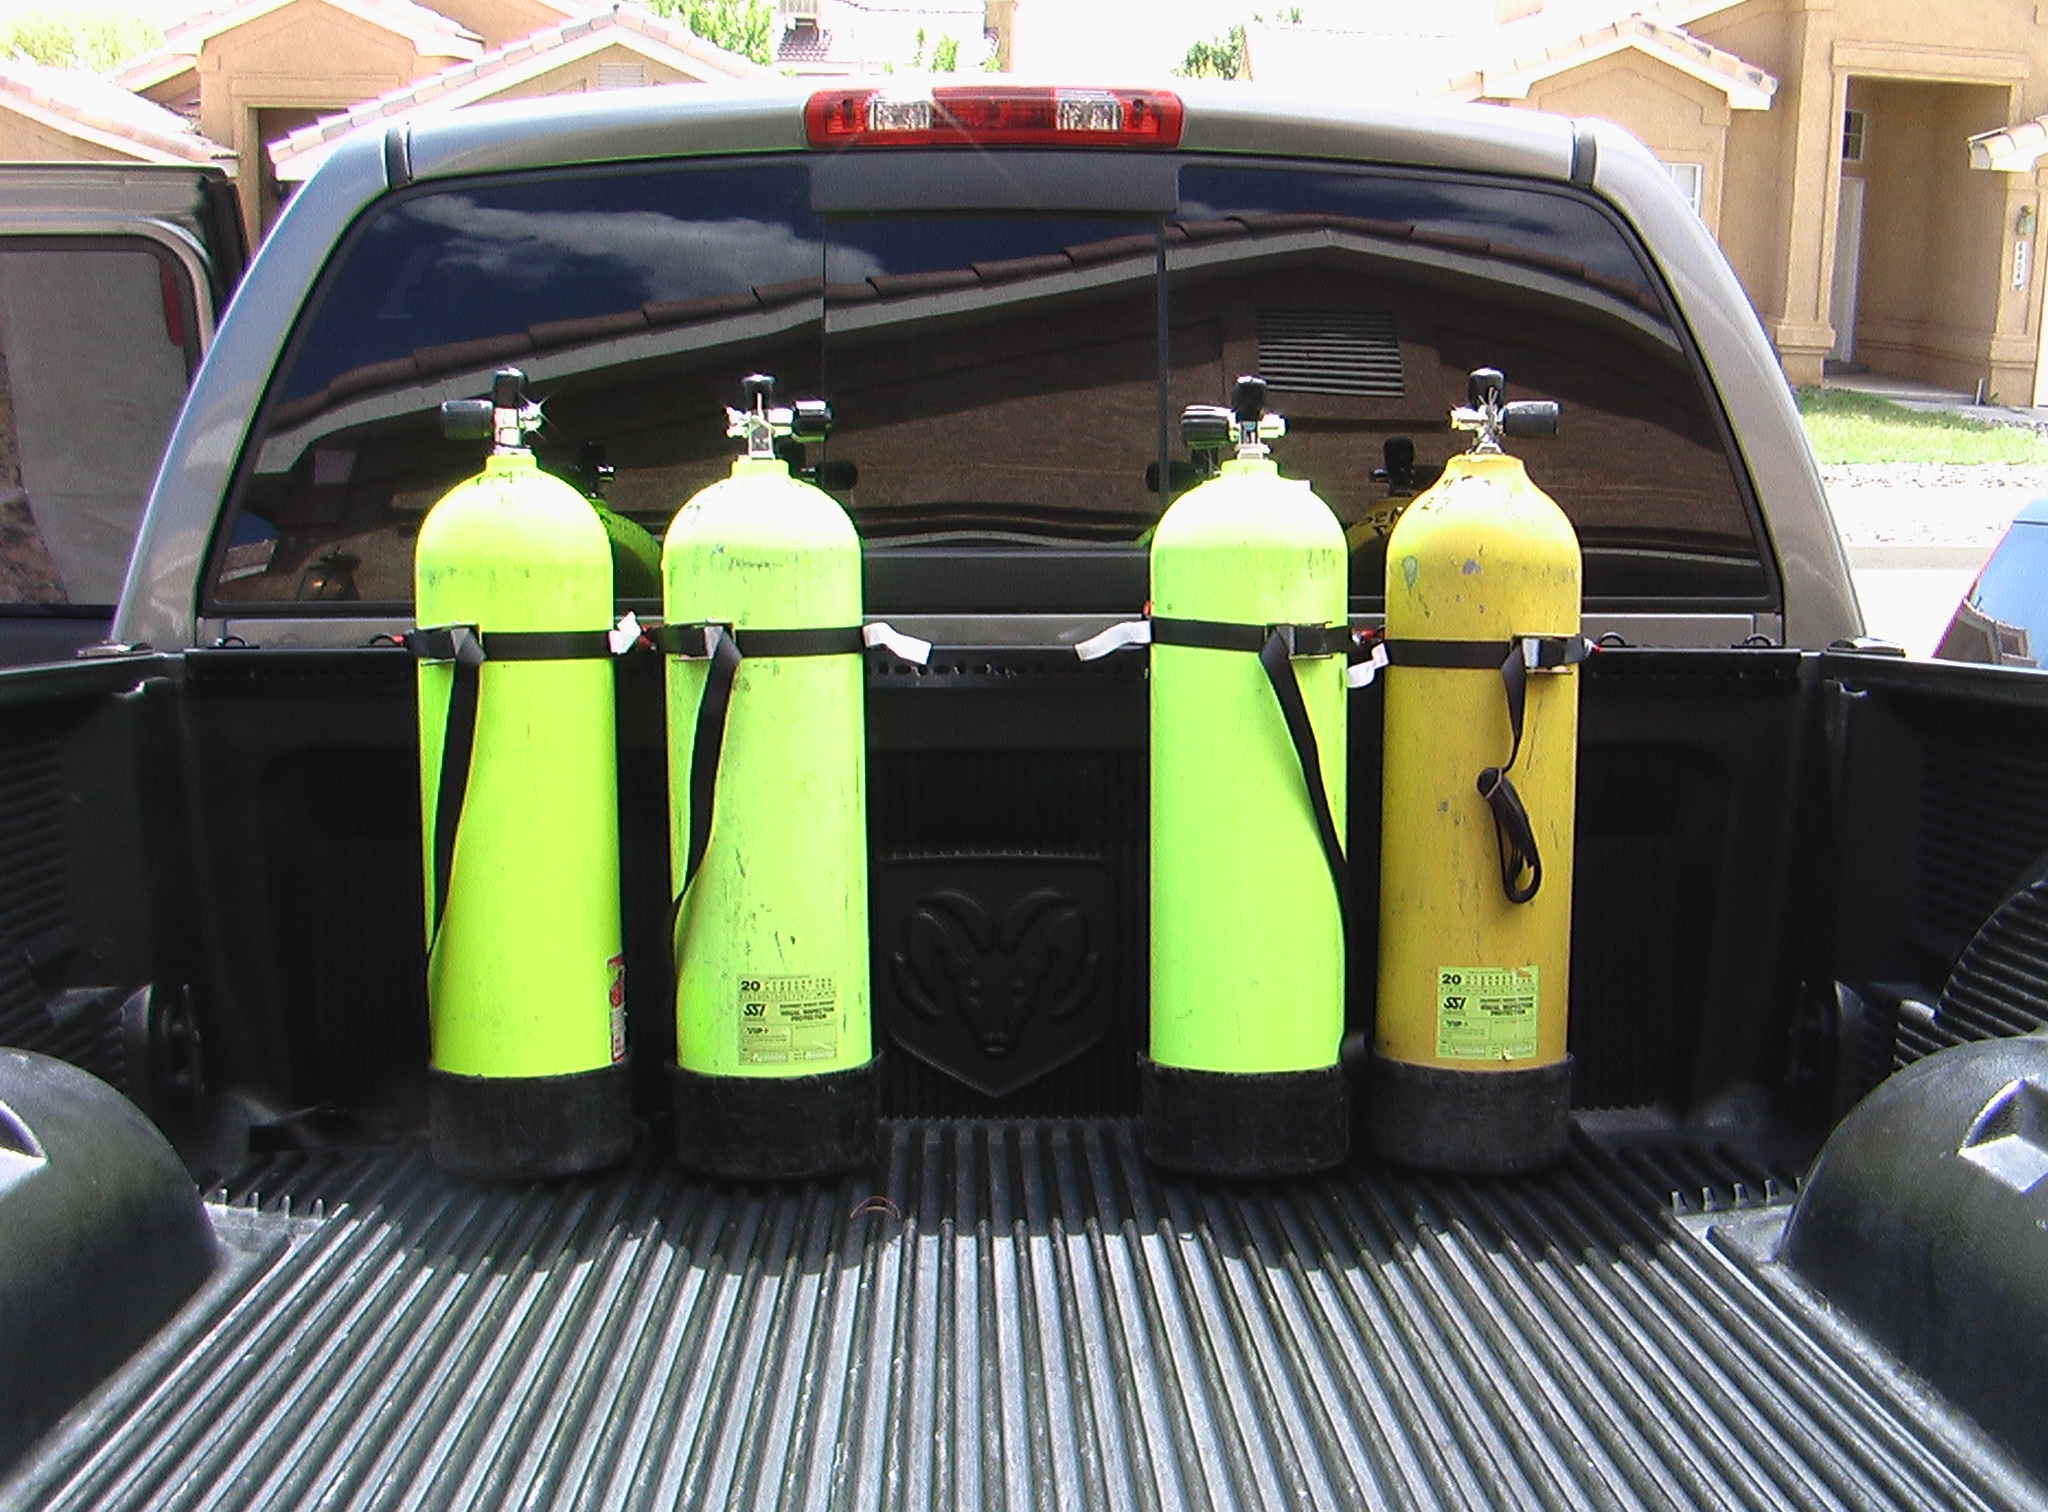
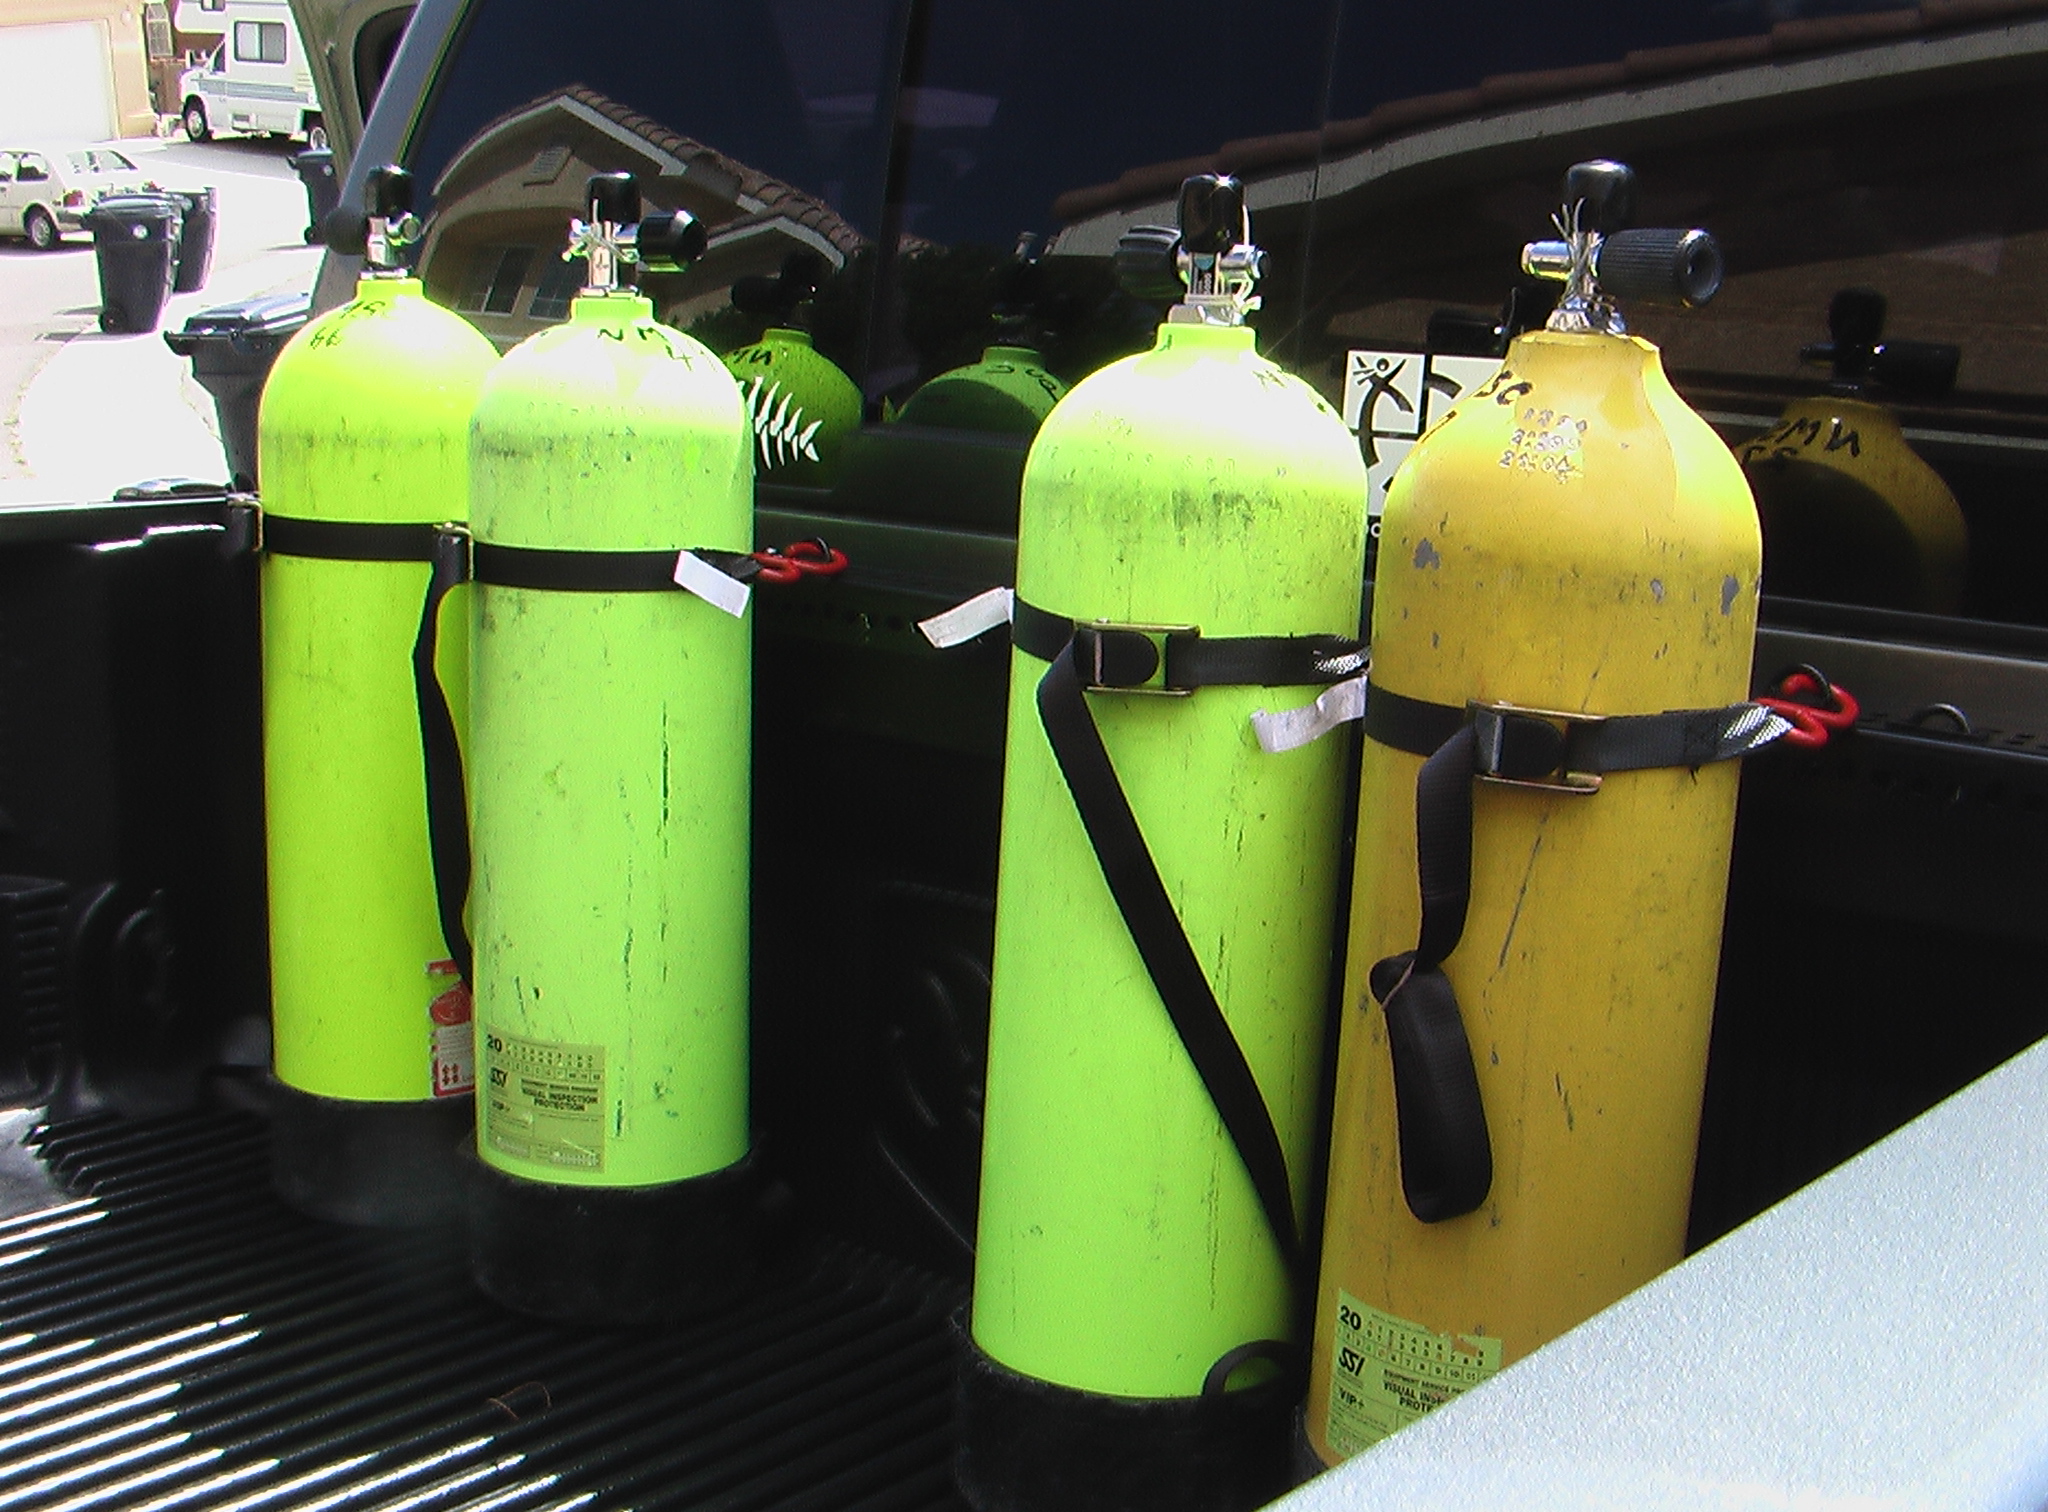
Once I got the "L" strut mounted, I measured off holes so I
could mount 7" diameter SCUBA tanks, three on the left, three on the
right. You can see the push-up tie-downs in the stake pockets which are
still 100% usable with the new UbiquiRack. In the bottom left picture
it's easy to see that not only do I have a horizontal face where the
u-bolts are now, but I also have a vertical face to place u-bolts or
other clamps. Also notice in the bottom right picture that the
UbiquiRack is very low profile and blends in very nicely with the
bedliner. It's almost invisible.


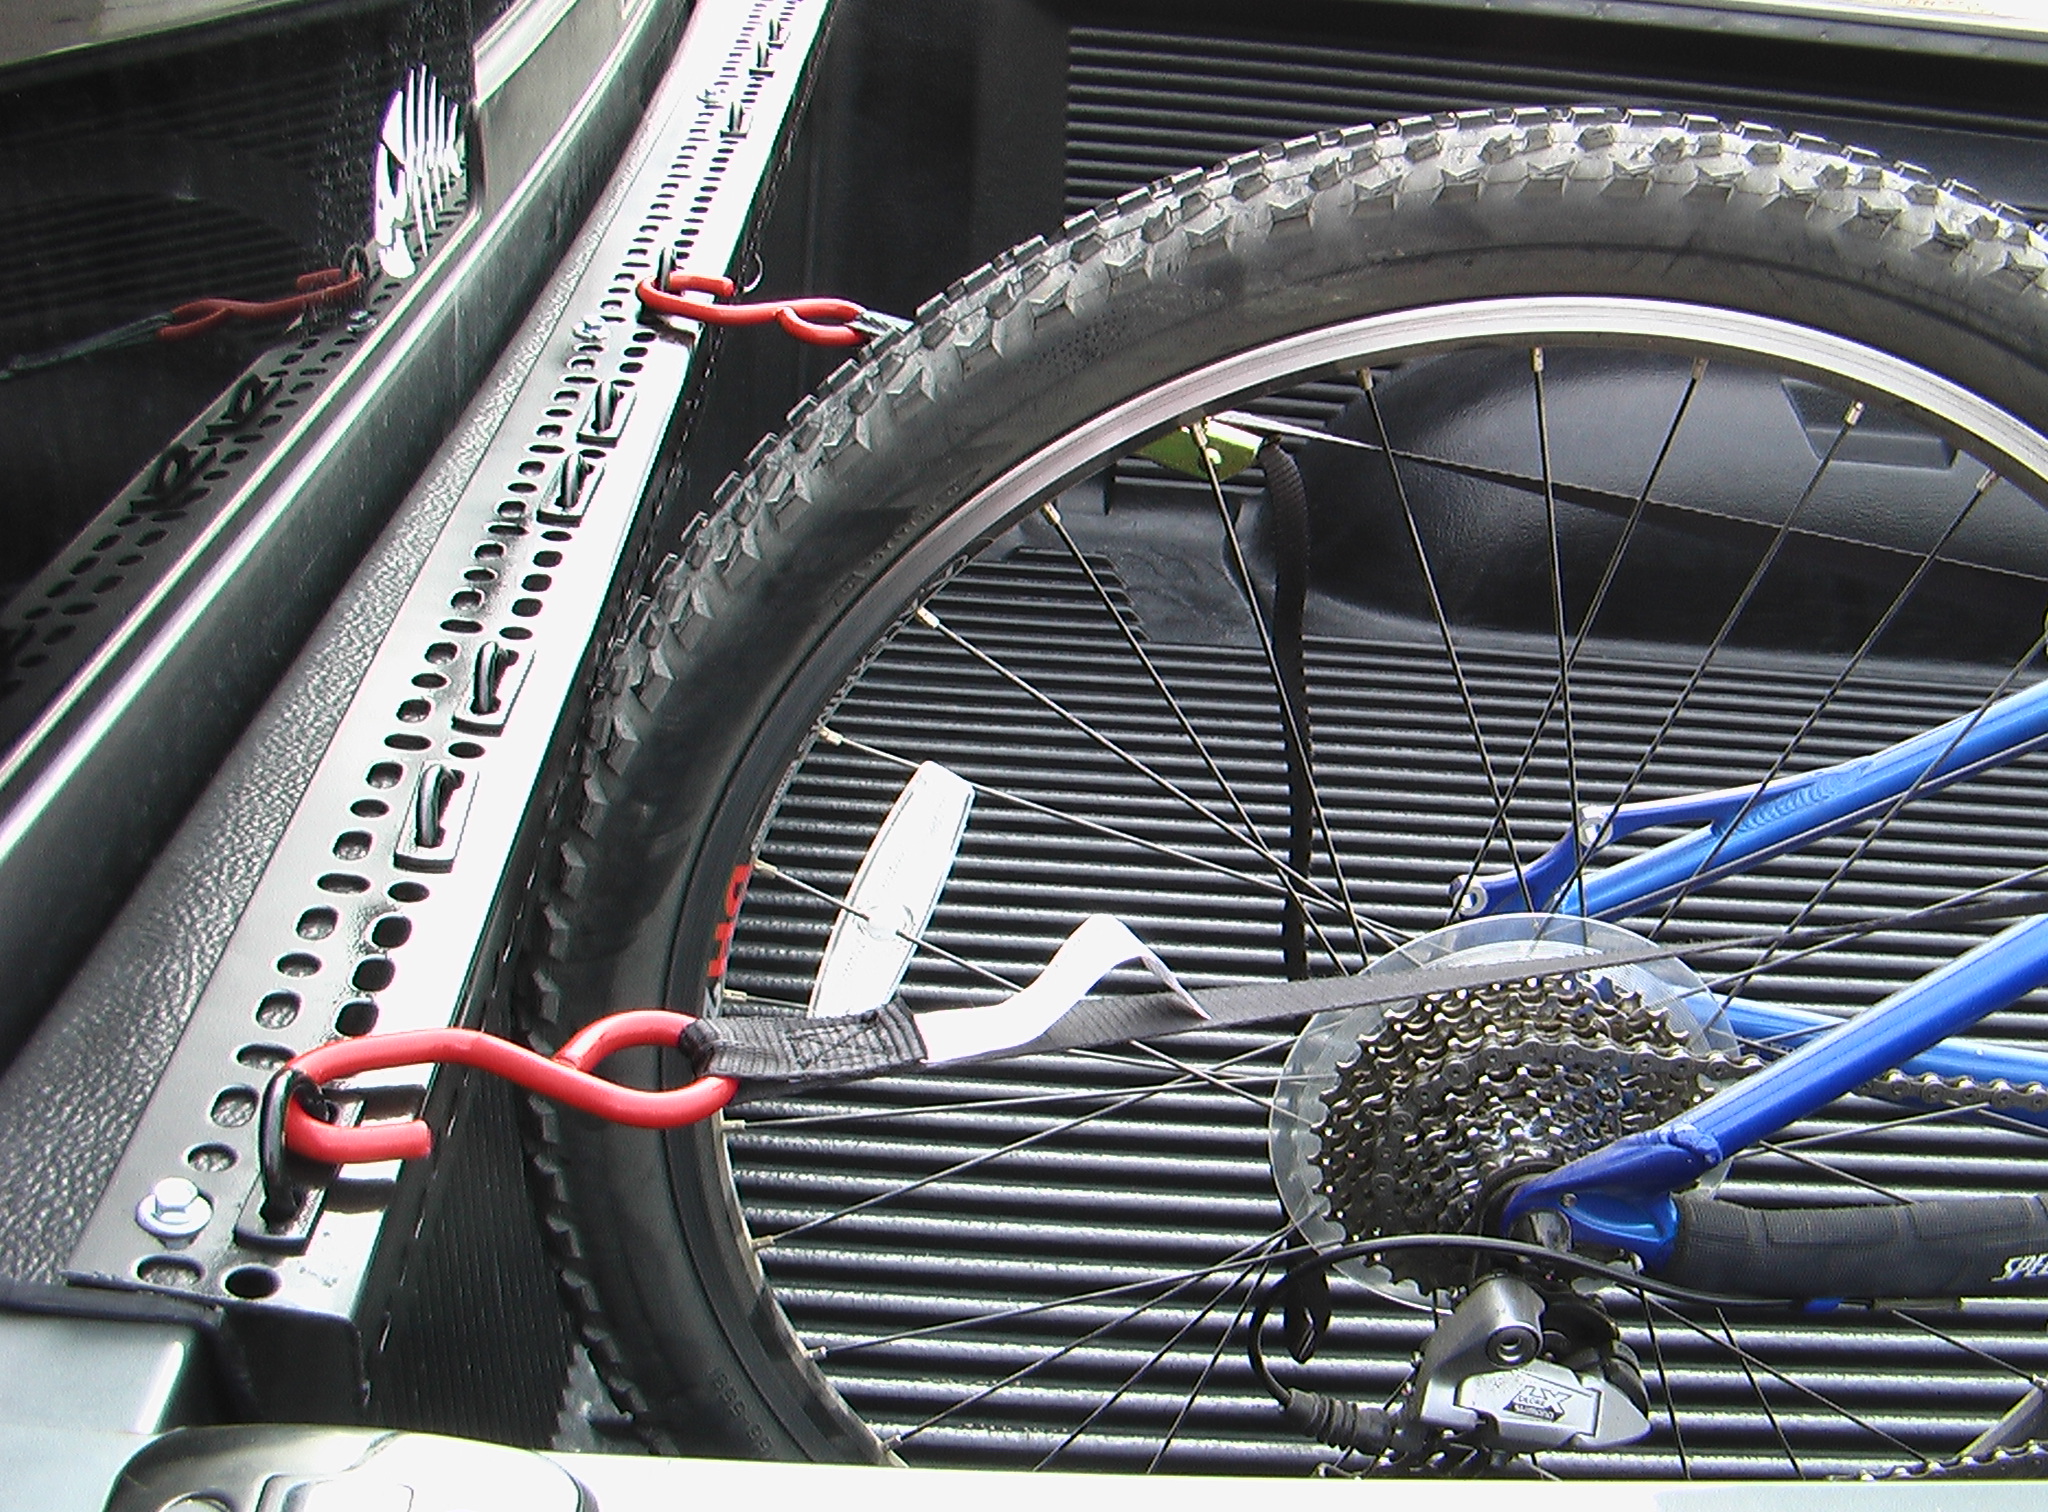
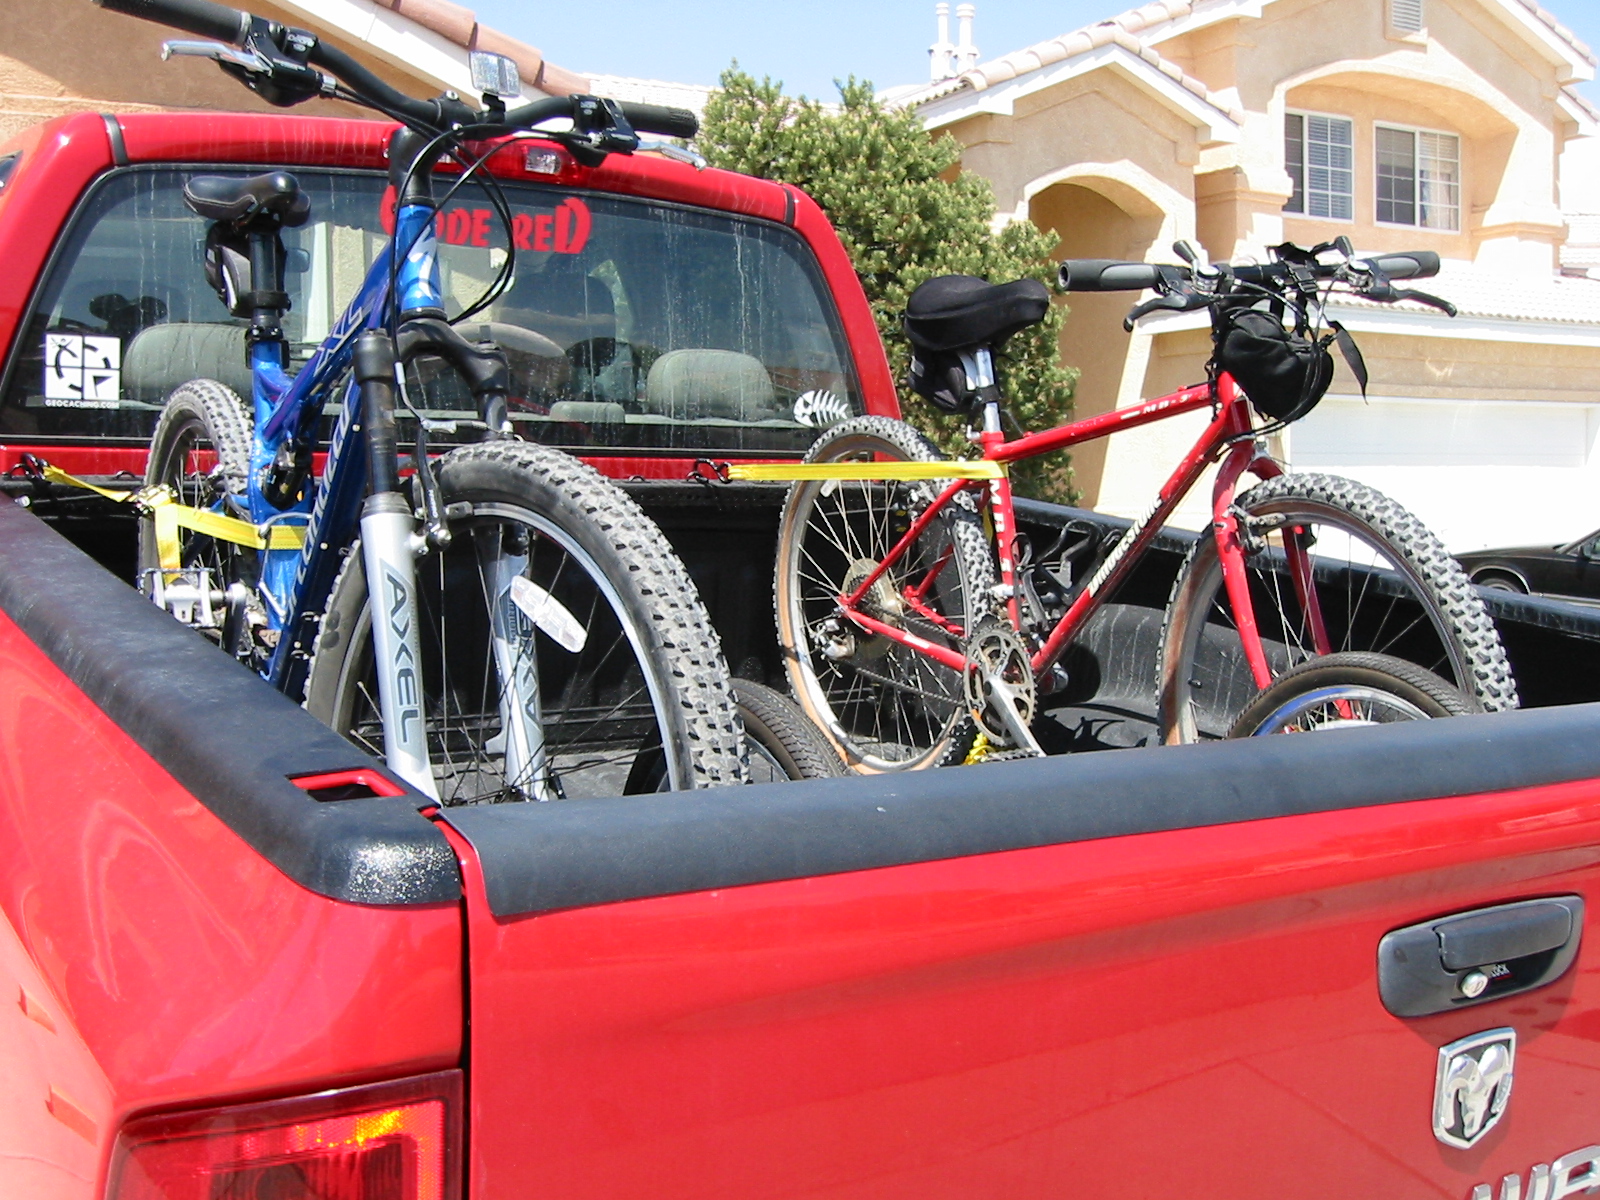
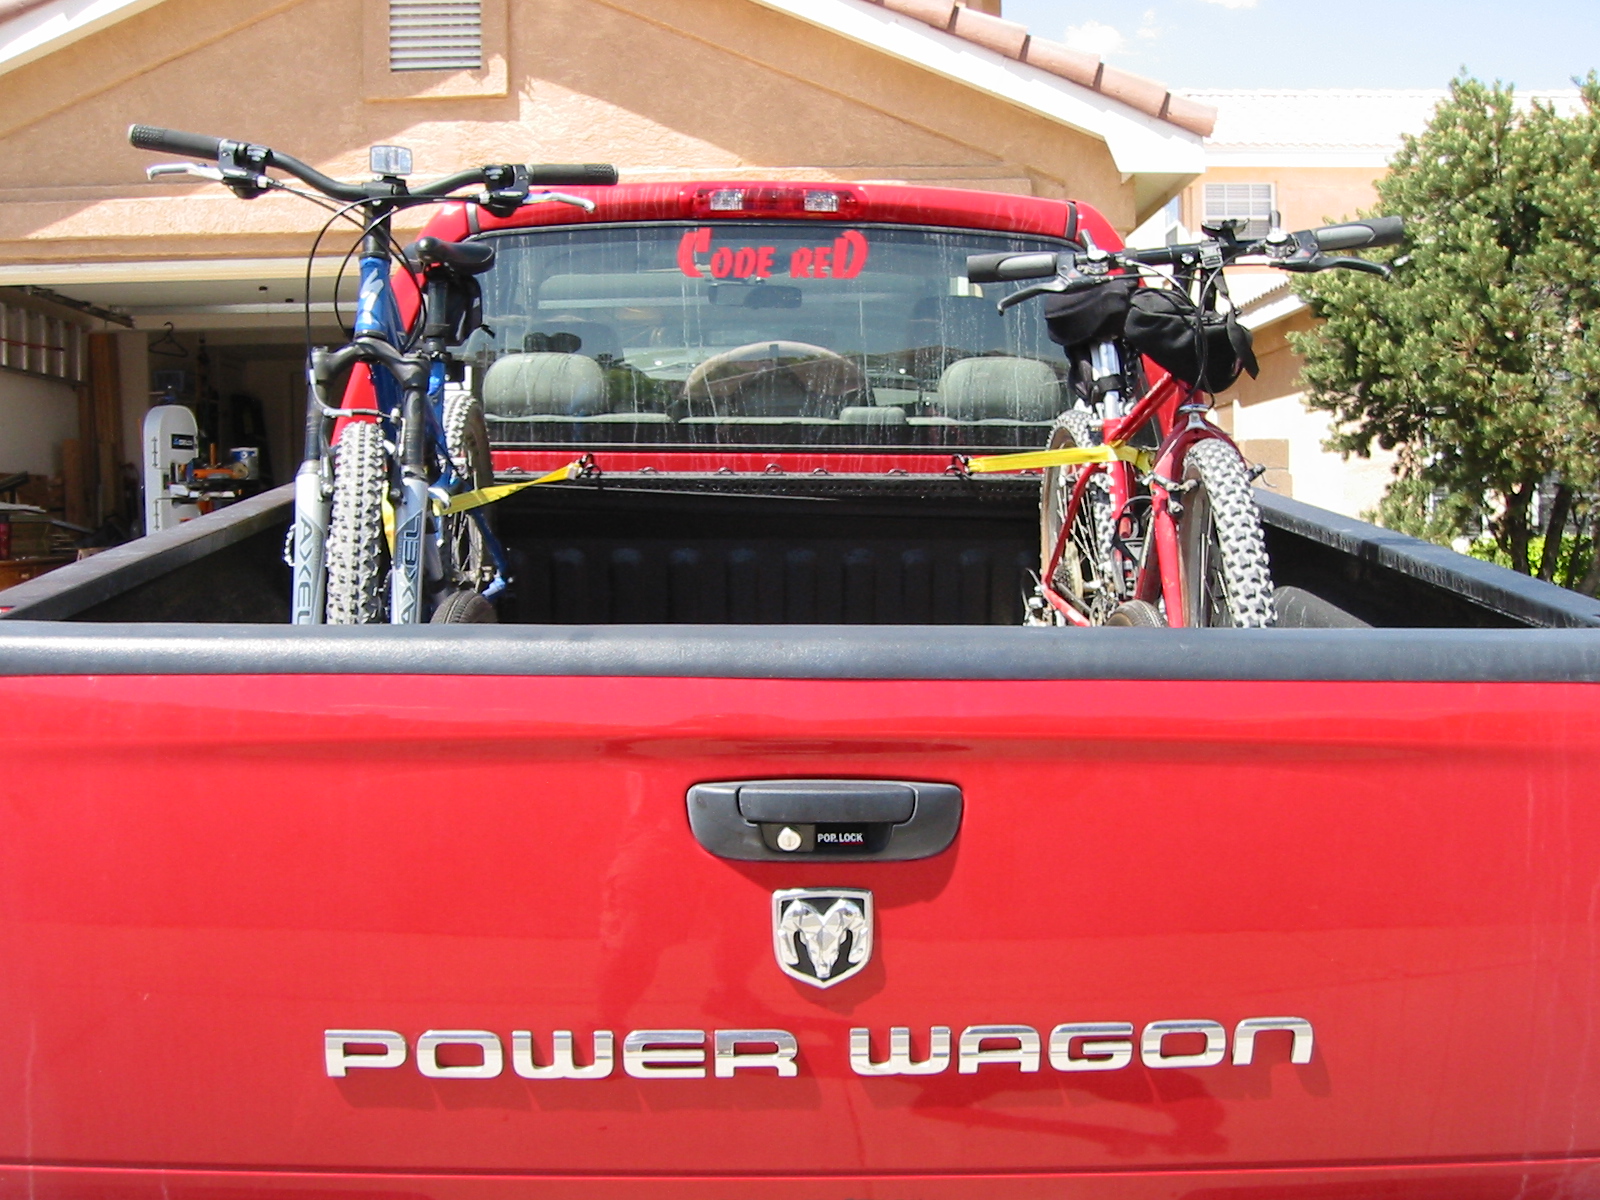
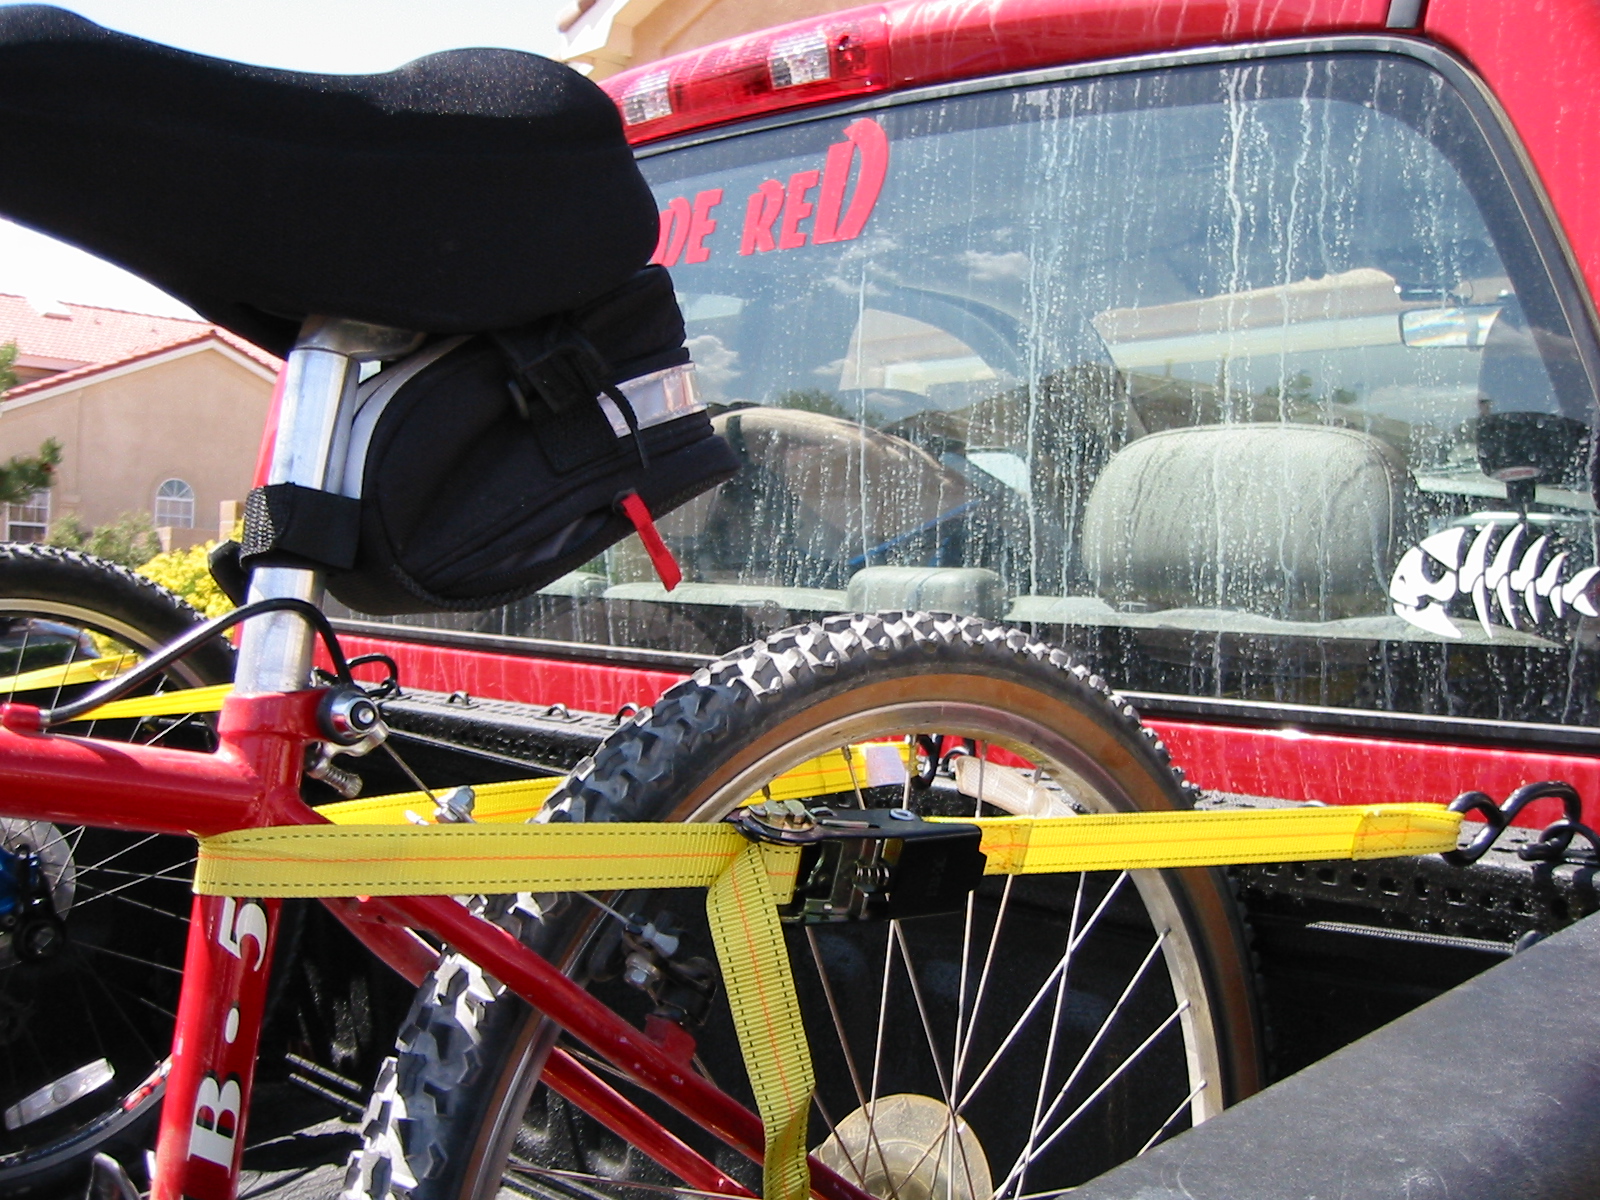
Ok, so at this point, I was more or less done and it was time to test things out. I had purchased some tie-down straps from Home Depot a while back, 4-pack of 6' straps for about $15.00, and was thinking about cutting off the excess so they'd be just the right size for the SCUBA tanks. On a whim though, I decided to stick a mountain bike in to see what kind of attachment I'd need to make in order to secure it to the UbiquiRack. Surprisingly, the strap was a perfect match for strapping the bike in so I decided not to cut them.
I took the truck for a drive with the bike strapped in as it was and didn't have any problems with the bike staying upright. However, I think on a bumpy dirt road this might not be the case, so I'm going to build a bracket that just bolts on right behind the tire and grabs it. This should keep it from twisting and falling over. I'm even thinking about a way to use a lock with it to prevent someone from just unstrapping the bikes and taking off. Originally I was going to build an arm bracket that would bolt to the UbiquiRack and stick out with a clamp to grip the gooseneck of the bike, but I think the tire clamp in conjunction with the tie-downs is going to work just fine.

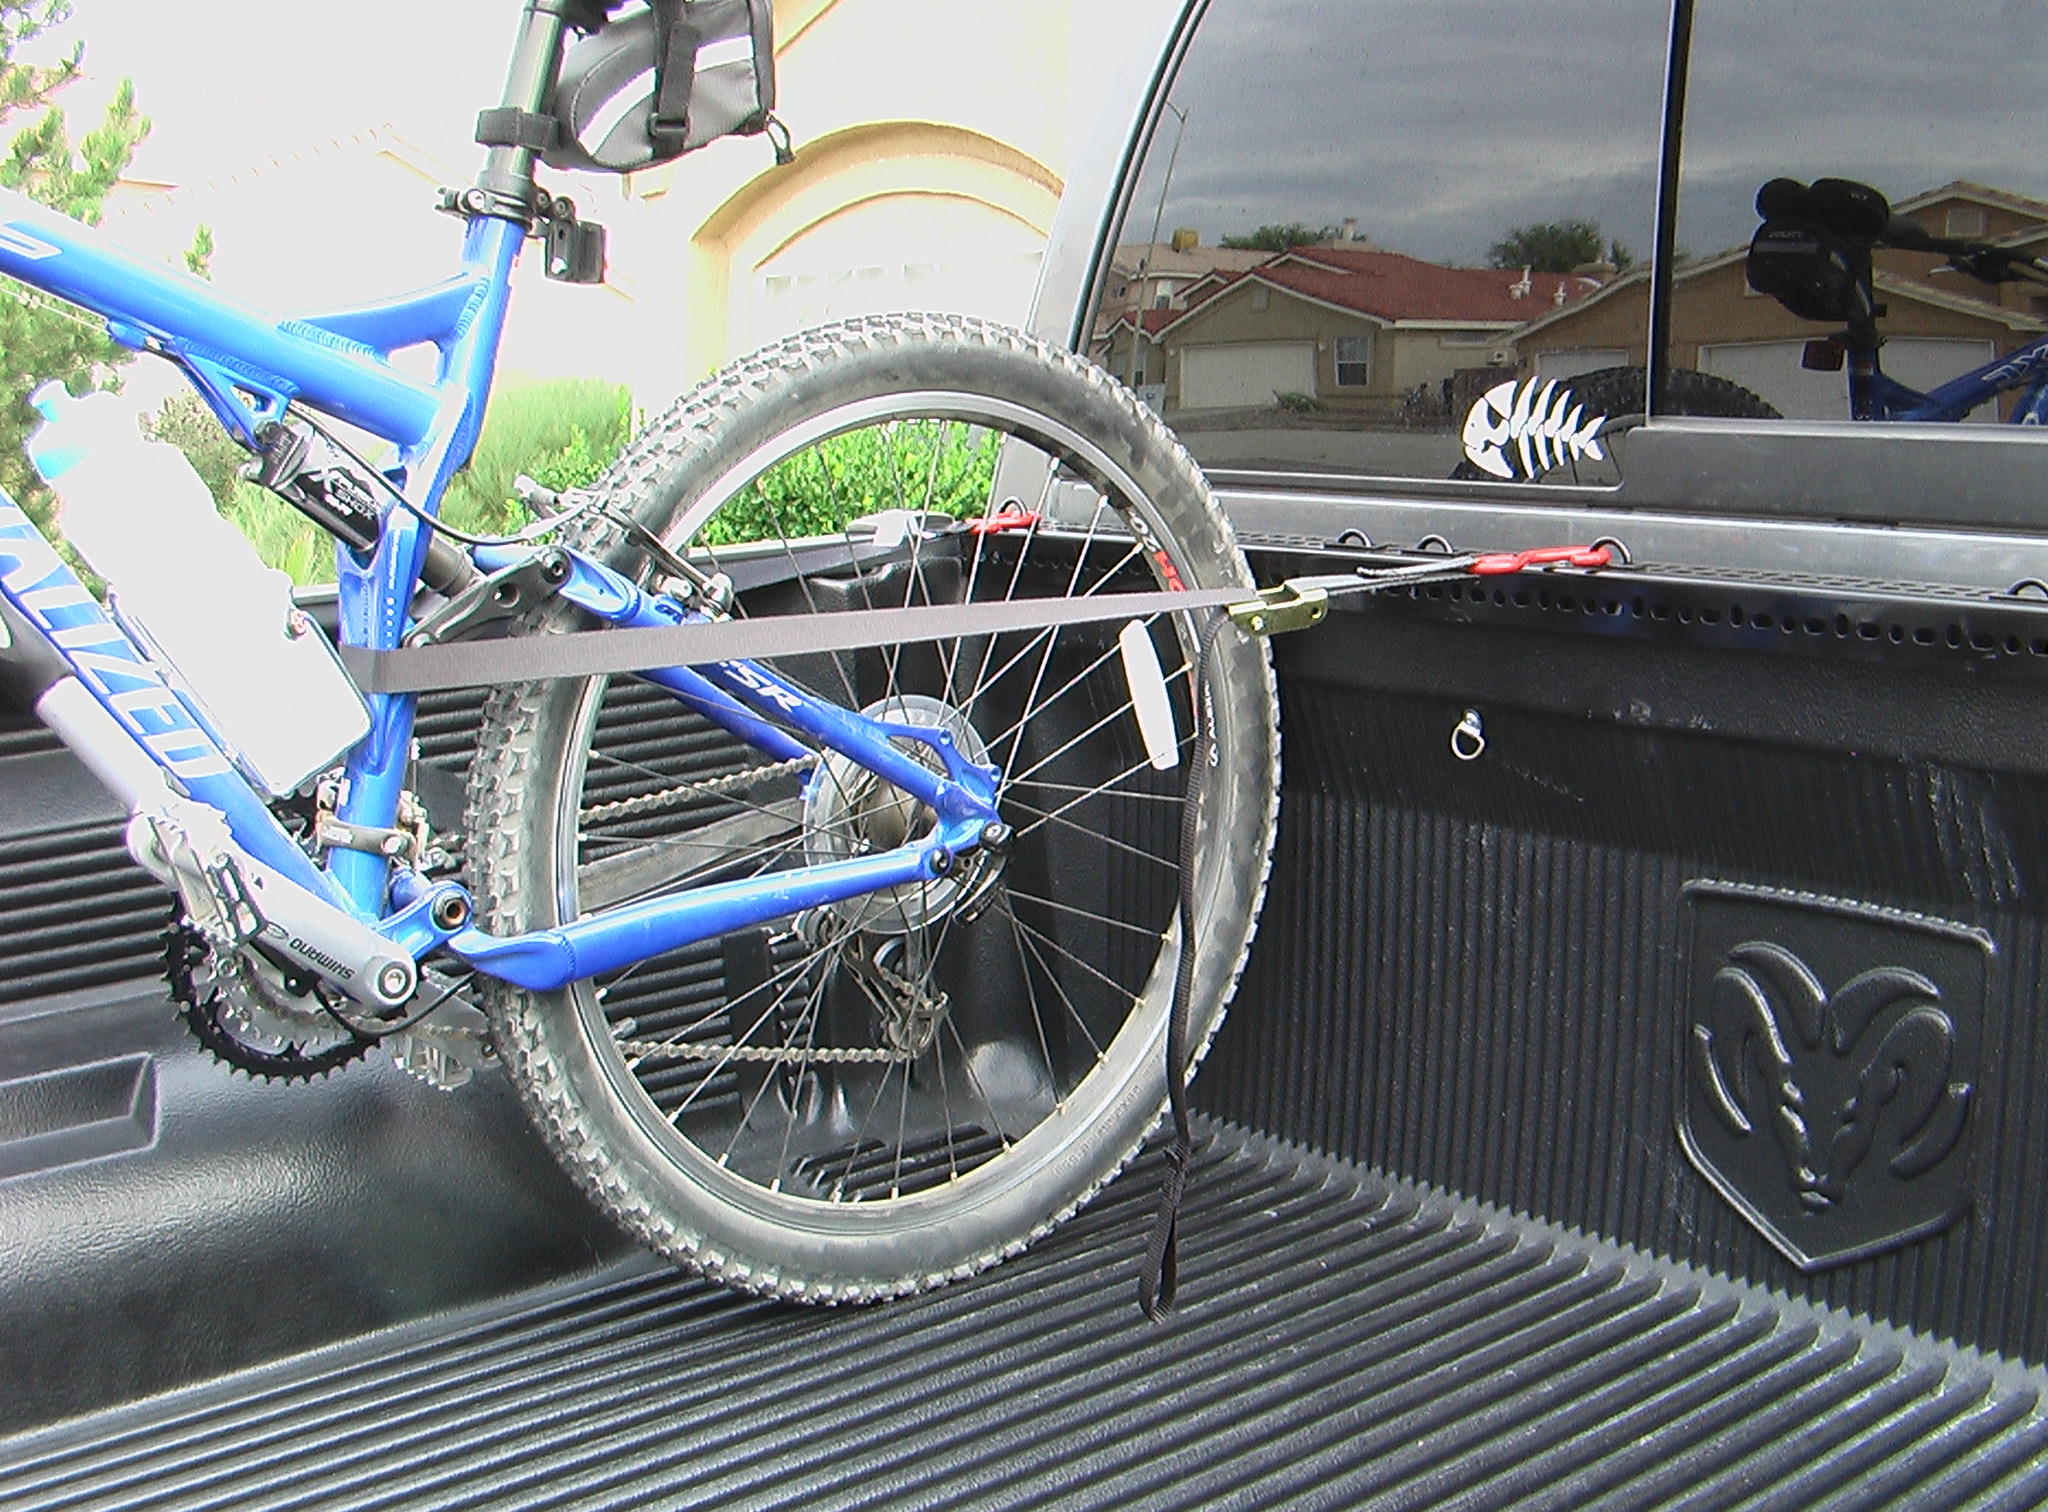
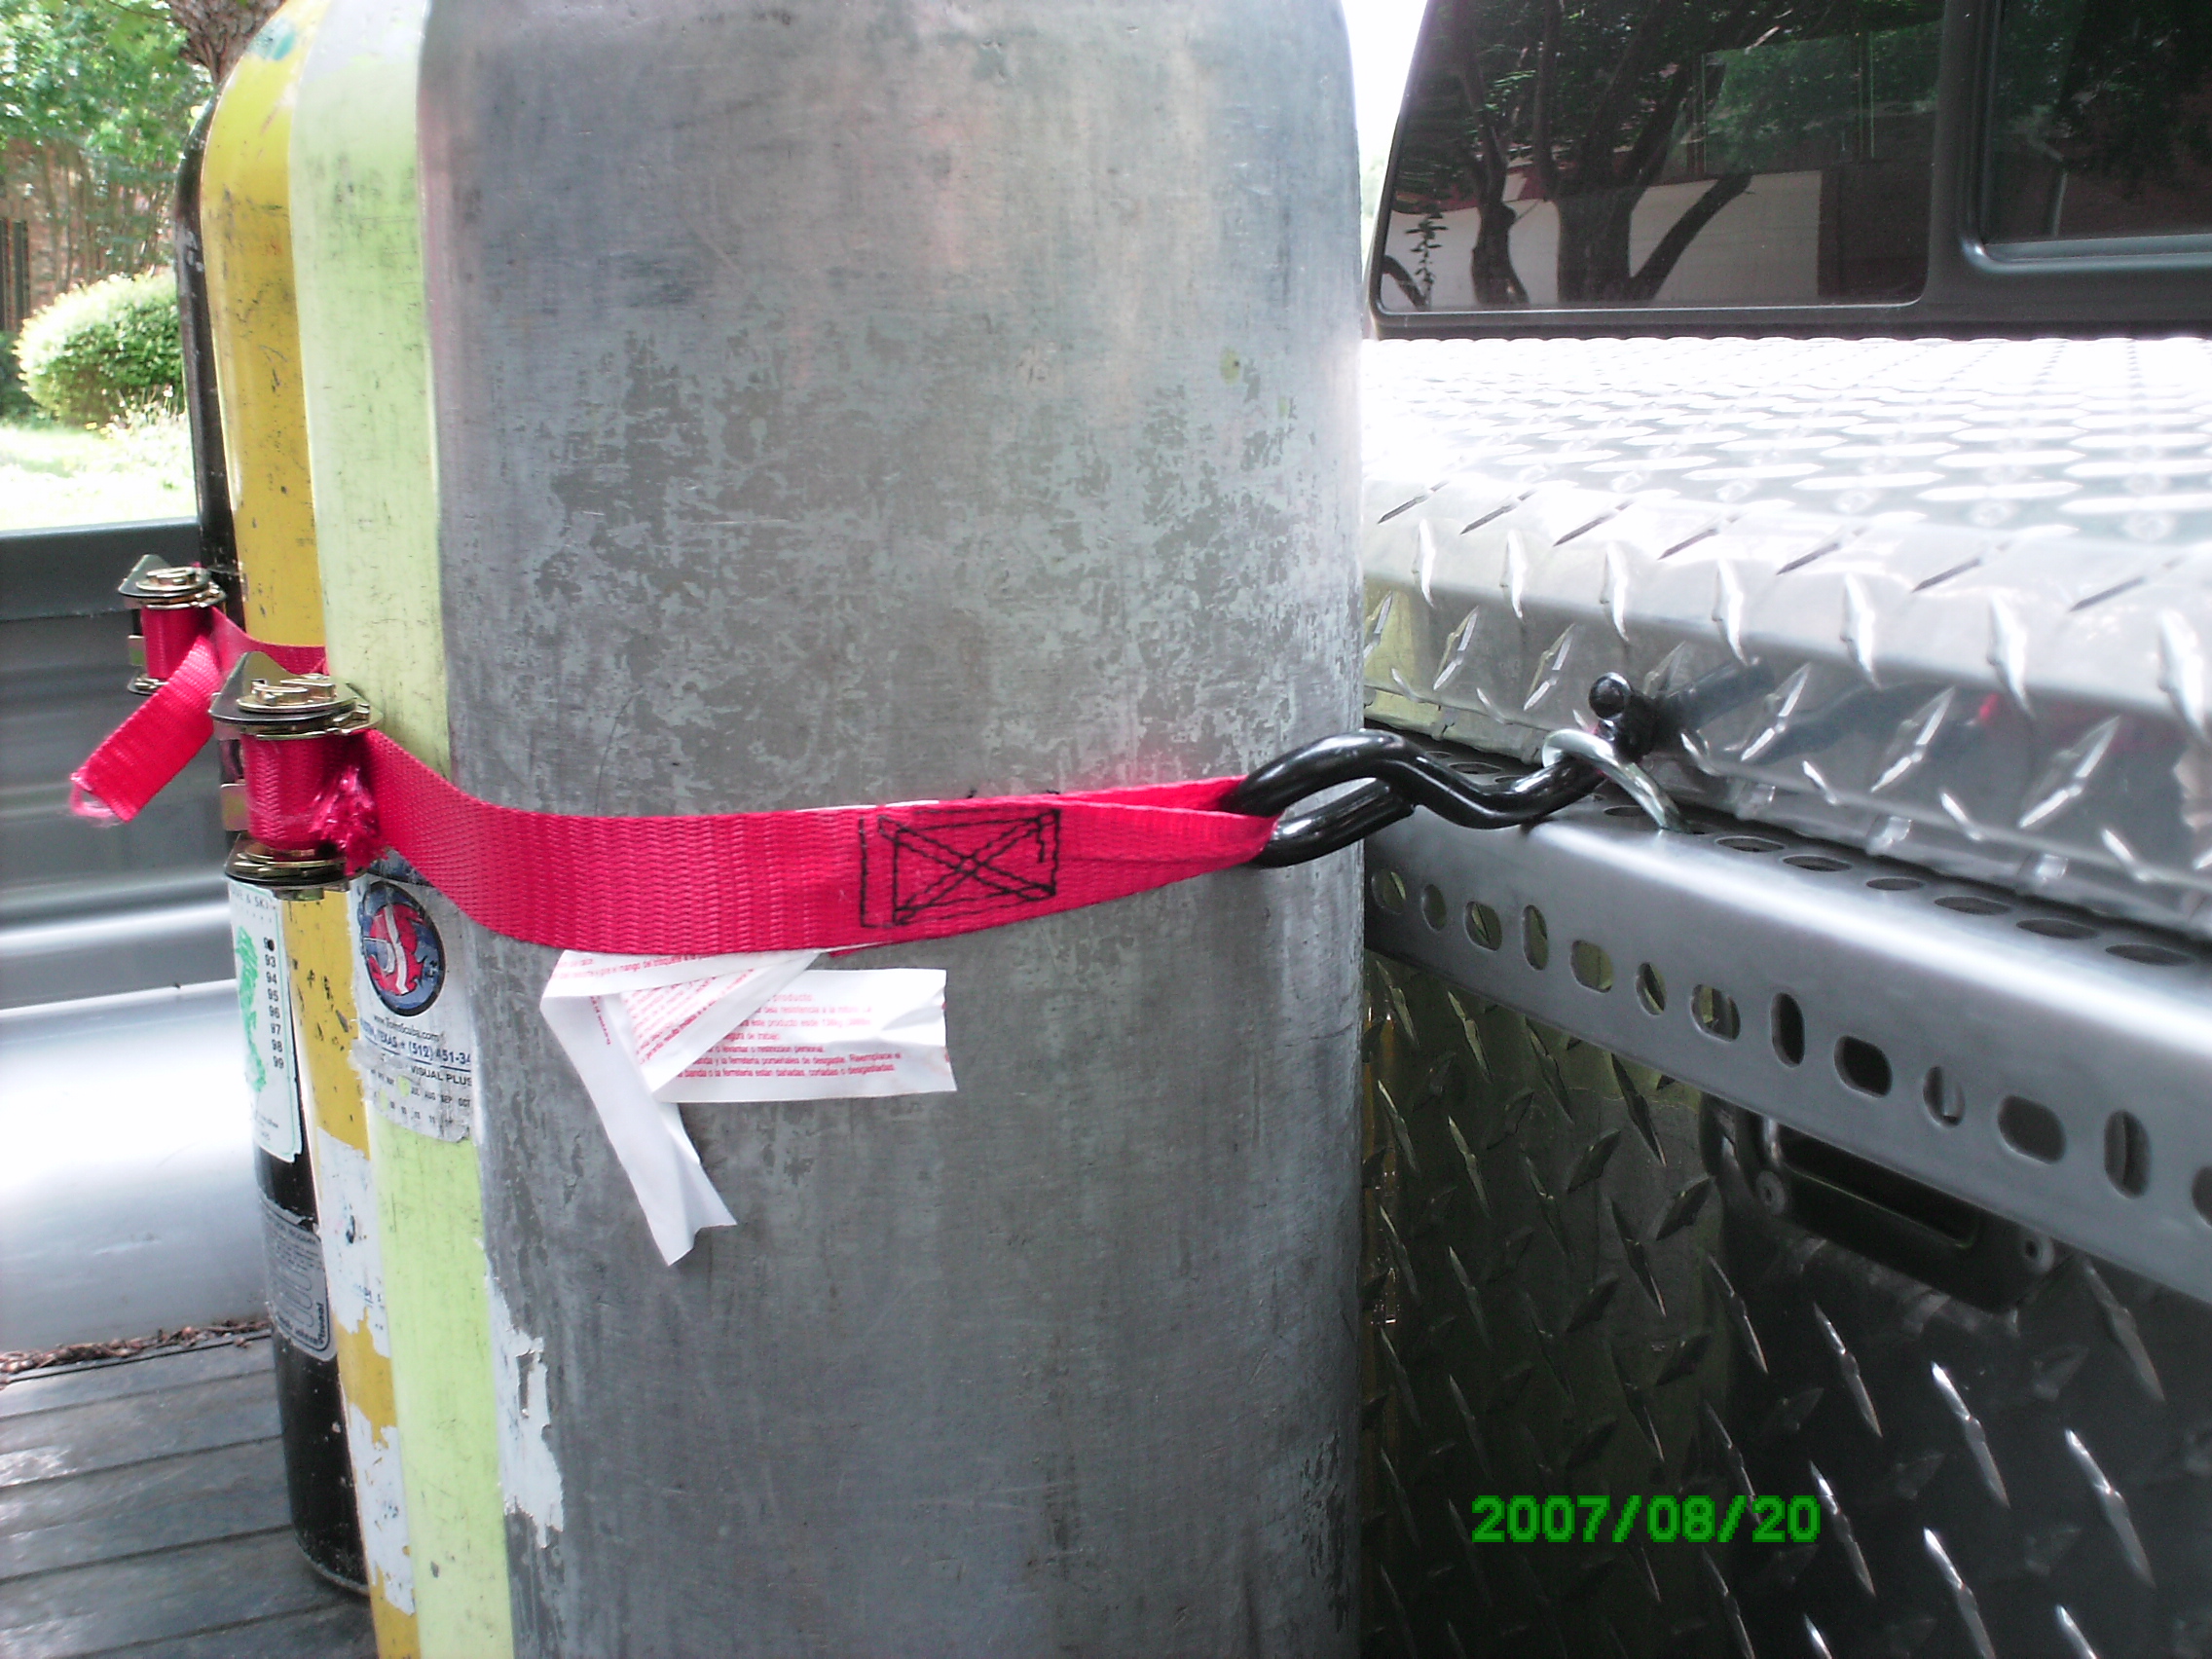
I didn't have a SCUBA tank handy, but I found a paint can in my garage that was 6 3/4" in diameter which was close enough for government work. I strapped that puppy in and it held very nicely. Even without it touching the floor of the bed, I couldn't get the paint can to fall out of the strap. With a full sized 80cu ft tank in there, I don't think there will be any problems whatsoever.


A couple of weeks later we went on a dive trip to Bottomless Lakes in Roswell, NM and I got a chance to load up some SCUBA tanks for a real test. It worked fantastically! You can see from the pics that I can actually mount up to seven tanks if need be. It looked good and worked great. Even after a four hour drive, they were rock steady in their straps.

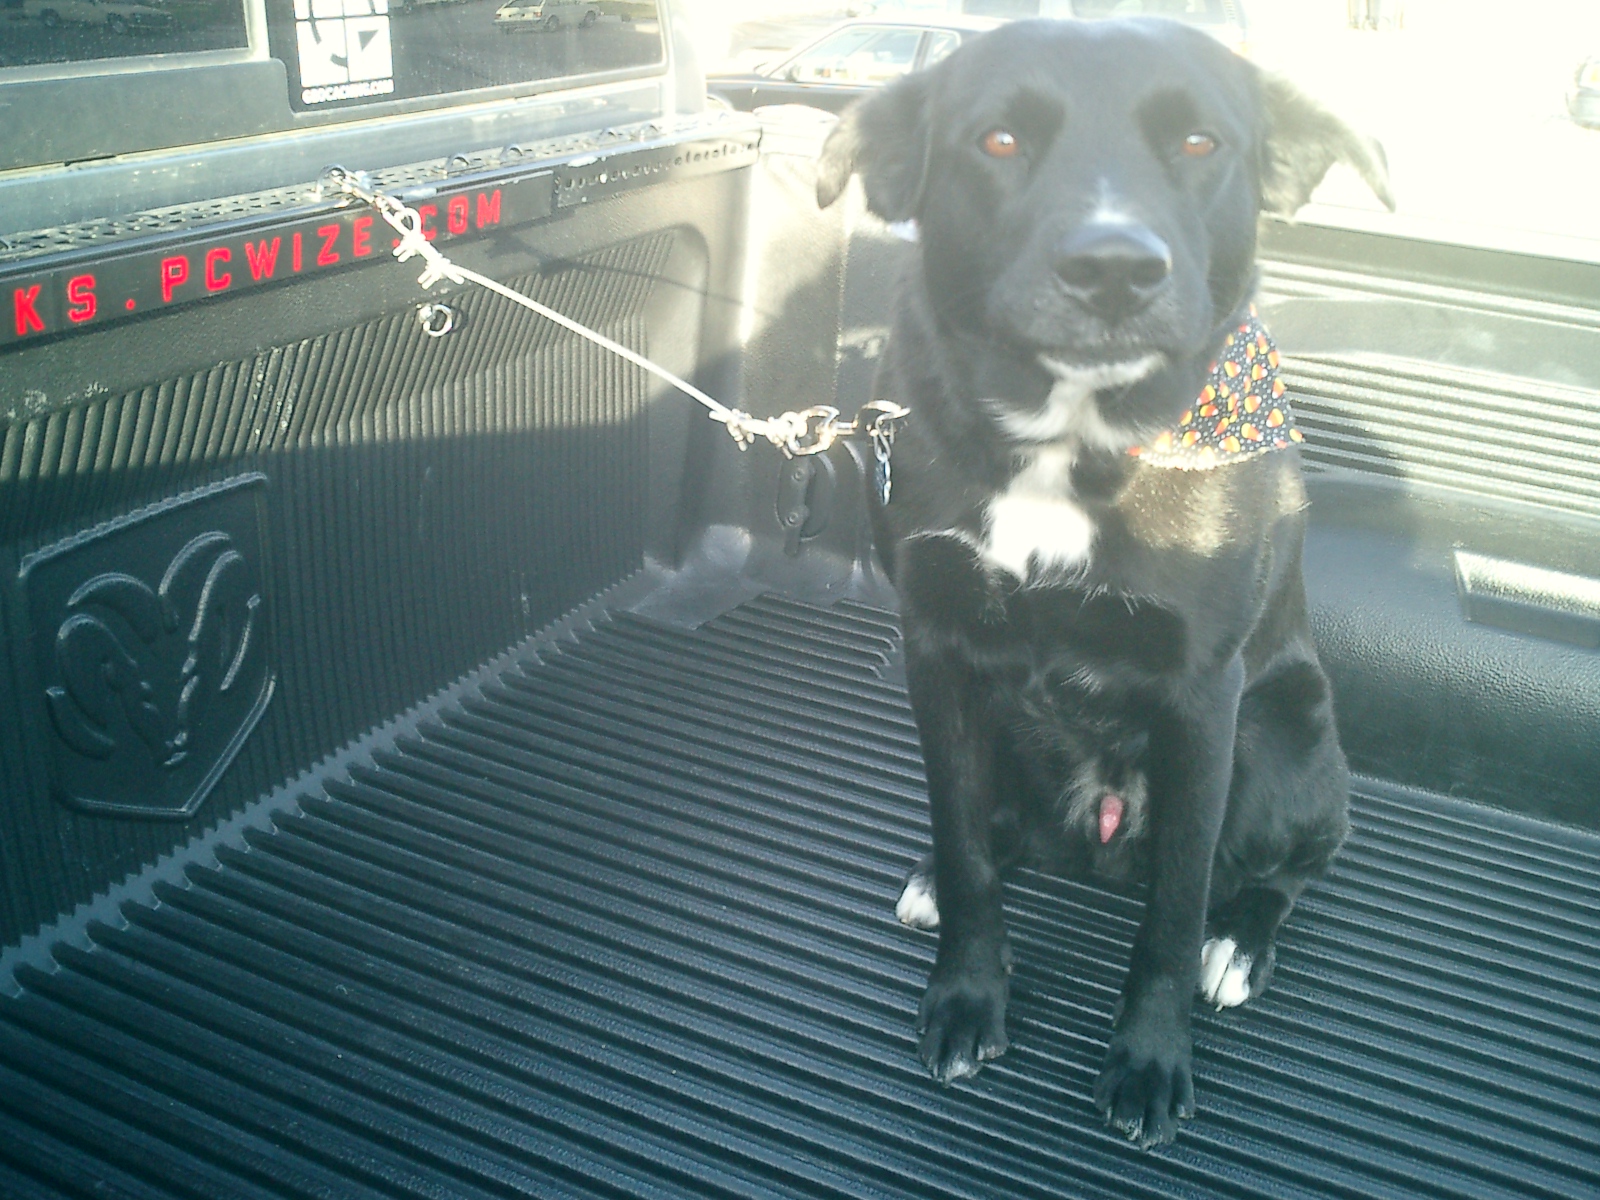
I haven't gotten to the ski / snowboard rack just yet, but I'm updating to show the dog leash. Usually my dog Shay rides in the cab with us, but sometimes there just isn't room. He really likes it in the back and for short trips I'm willing to accomodate him, but I'm paranoid thet he'll see something like a rabbit and try to jump out. The UbiquiRack is perfect for allowing me to mount a leash / dog run type system.
The leash is the easy one, as I just clip him into a u-bolt and make sure the leash is too short for him to get to any edges of the truck. The problem with this setup is that it means he has to basically stay in one spot. I wanted to give Shay the opportunity to move around in the bed a bit more, so was born the idea for an in-bed dog run (continued below pictures).


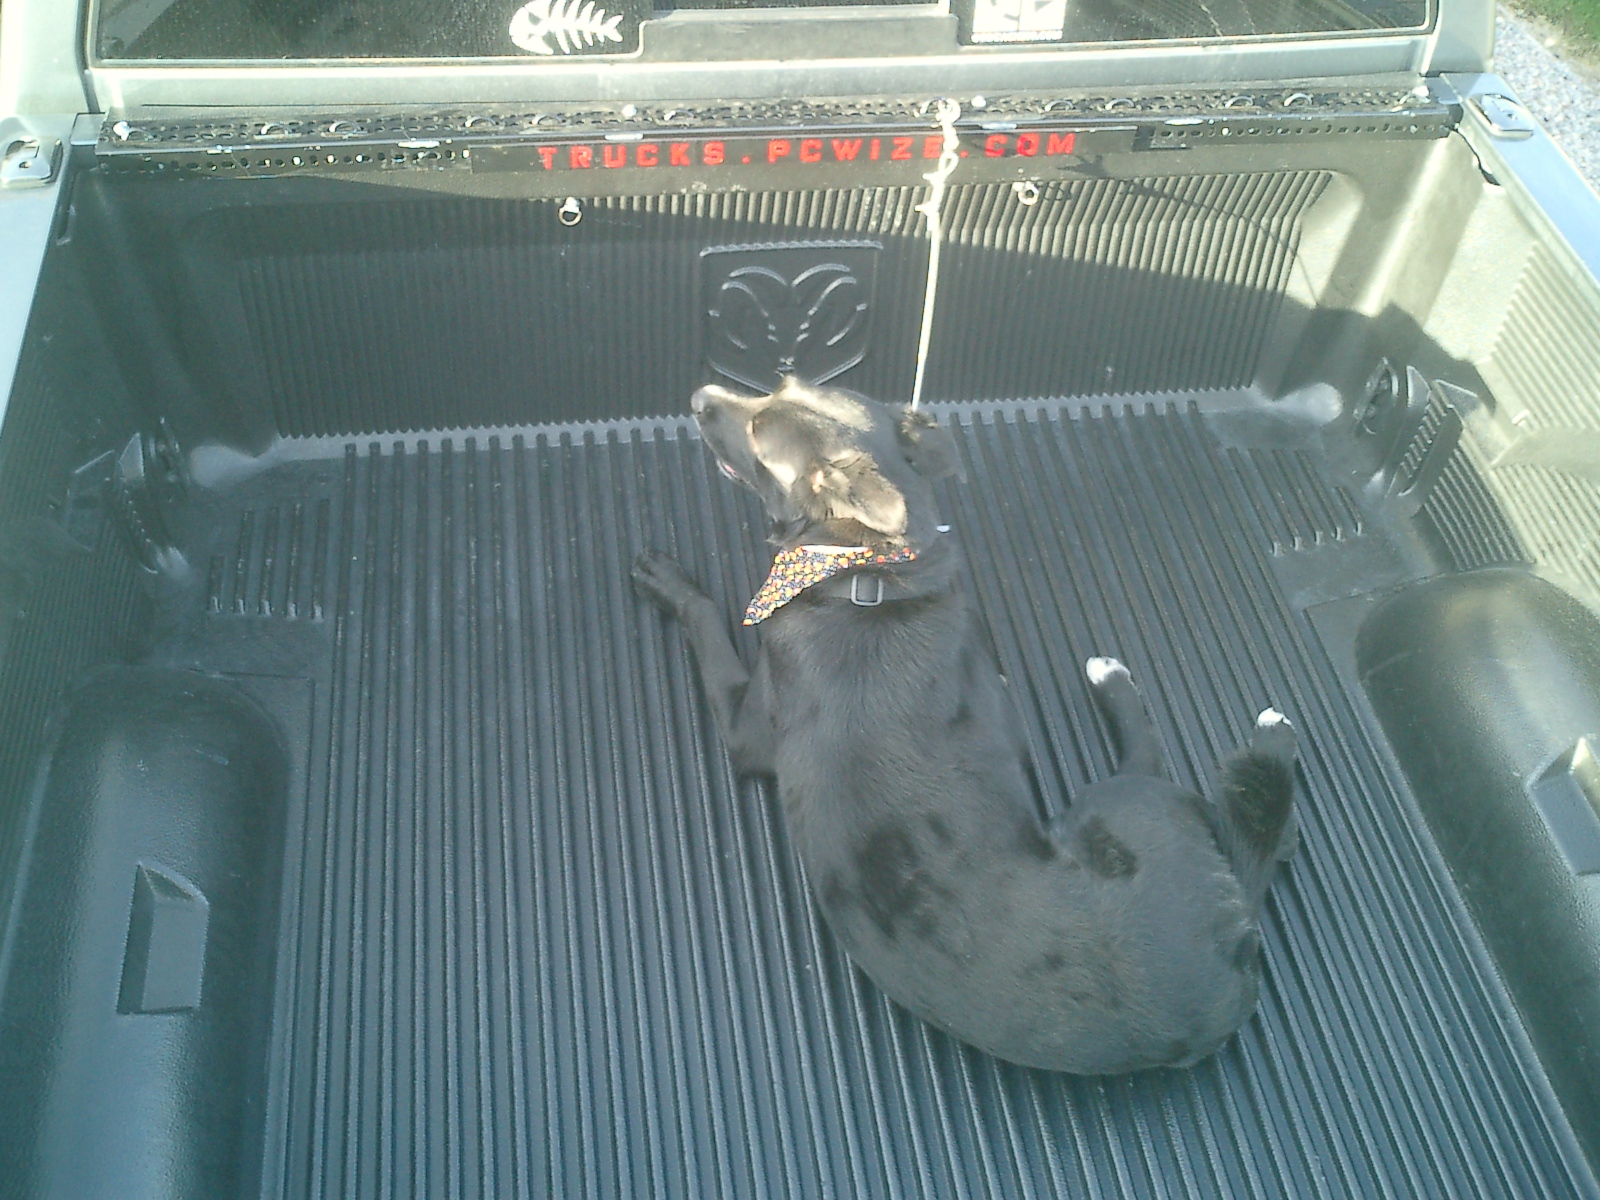

So the dog run will basically be the same type of leash system except that the cable will run the length of the bed from the UbiquiRack to the floor of the bed where I'll stick an anchor. The reason I'm running it to the floor rather than the top of the tailgate is that I wanted to end the run about 1.5' from the back of the truck so he couldn't fall out there. I'll get some pics up of the run really soon. I just have to put the anchor in the floor.
The leash cables and connectors I picked up at Home Depot and cost me about $12.00 total. The cable is the plastic coated wire rope.
UPDATE:
I built another UbiquiRack for the new truck. I didn't do much different this time excpet to use some shorter self-tapping screws, put more of the screws in to mount it, and painted it with Herculiner I had left over from the Herculiner Project. If it was nearly invisible before, it's even more so now that both the bed and the UbiquiRack are painted with the same stuff.
I read on a SCUBA forum where someone thought any unused ubolts would rattle and make a lot of noise. I can honestly report that this is not the case. I live in the desert with washboard roads galore and I can not recall ever hearing them rattle. Most likely because they're painted.
Here's some pics:

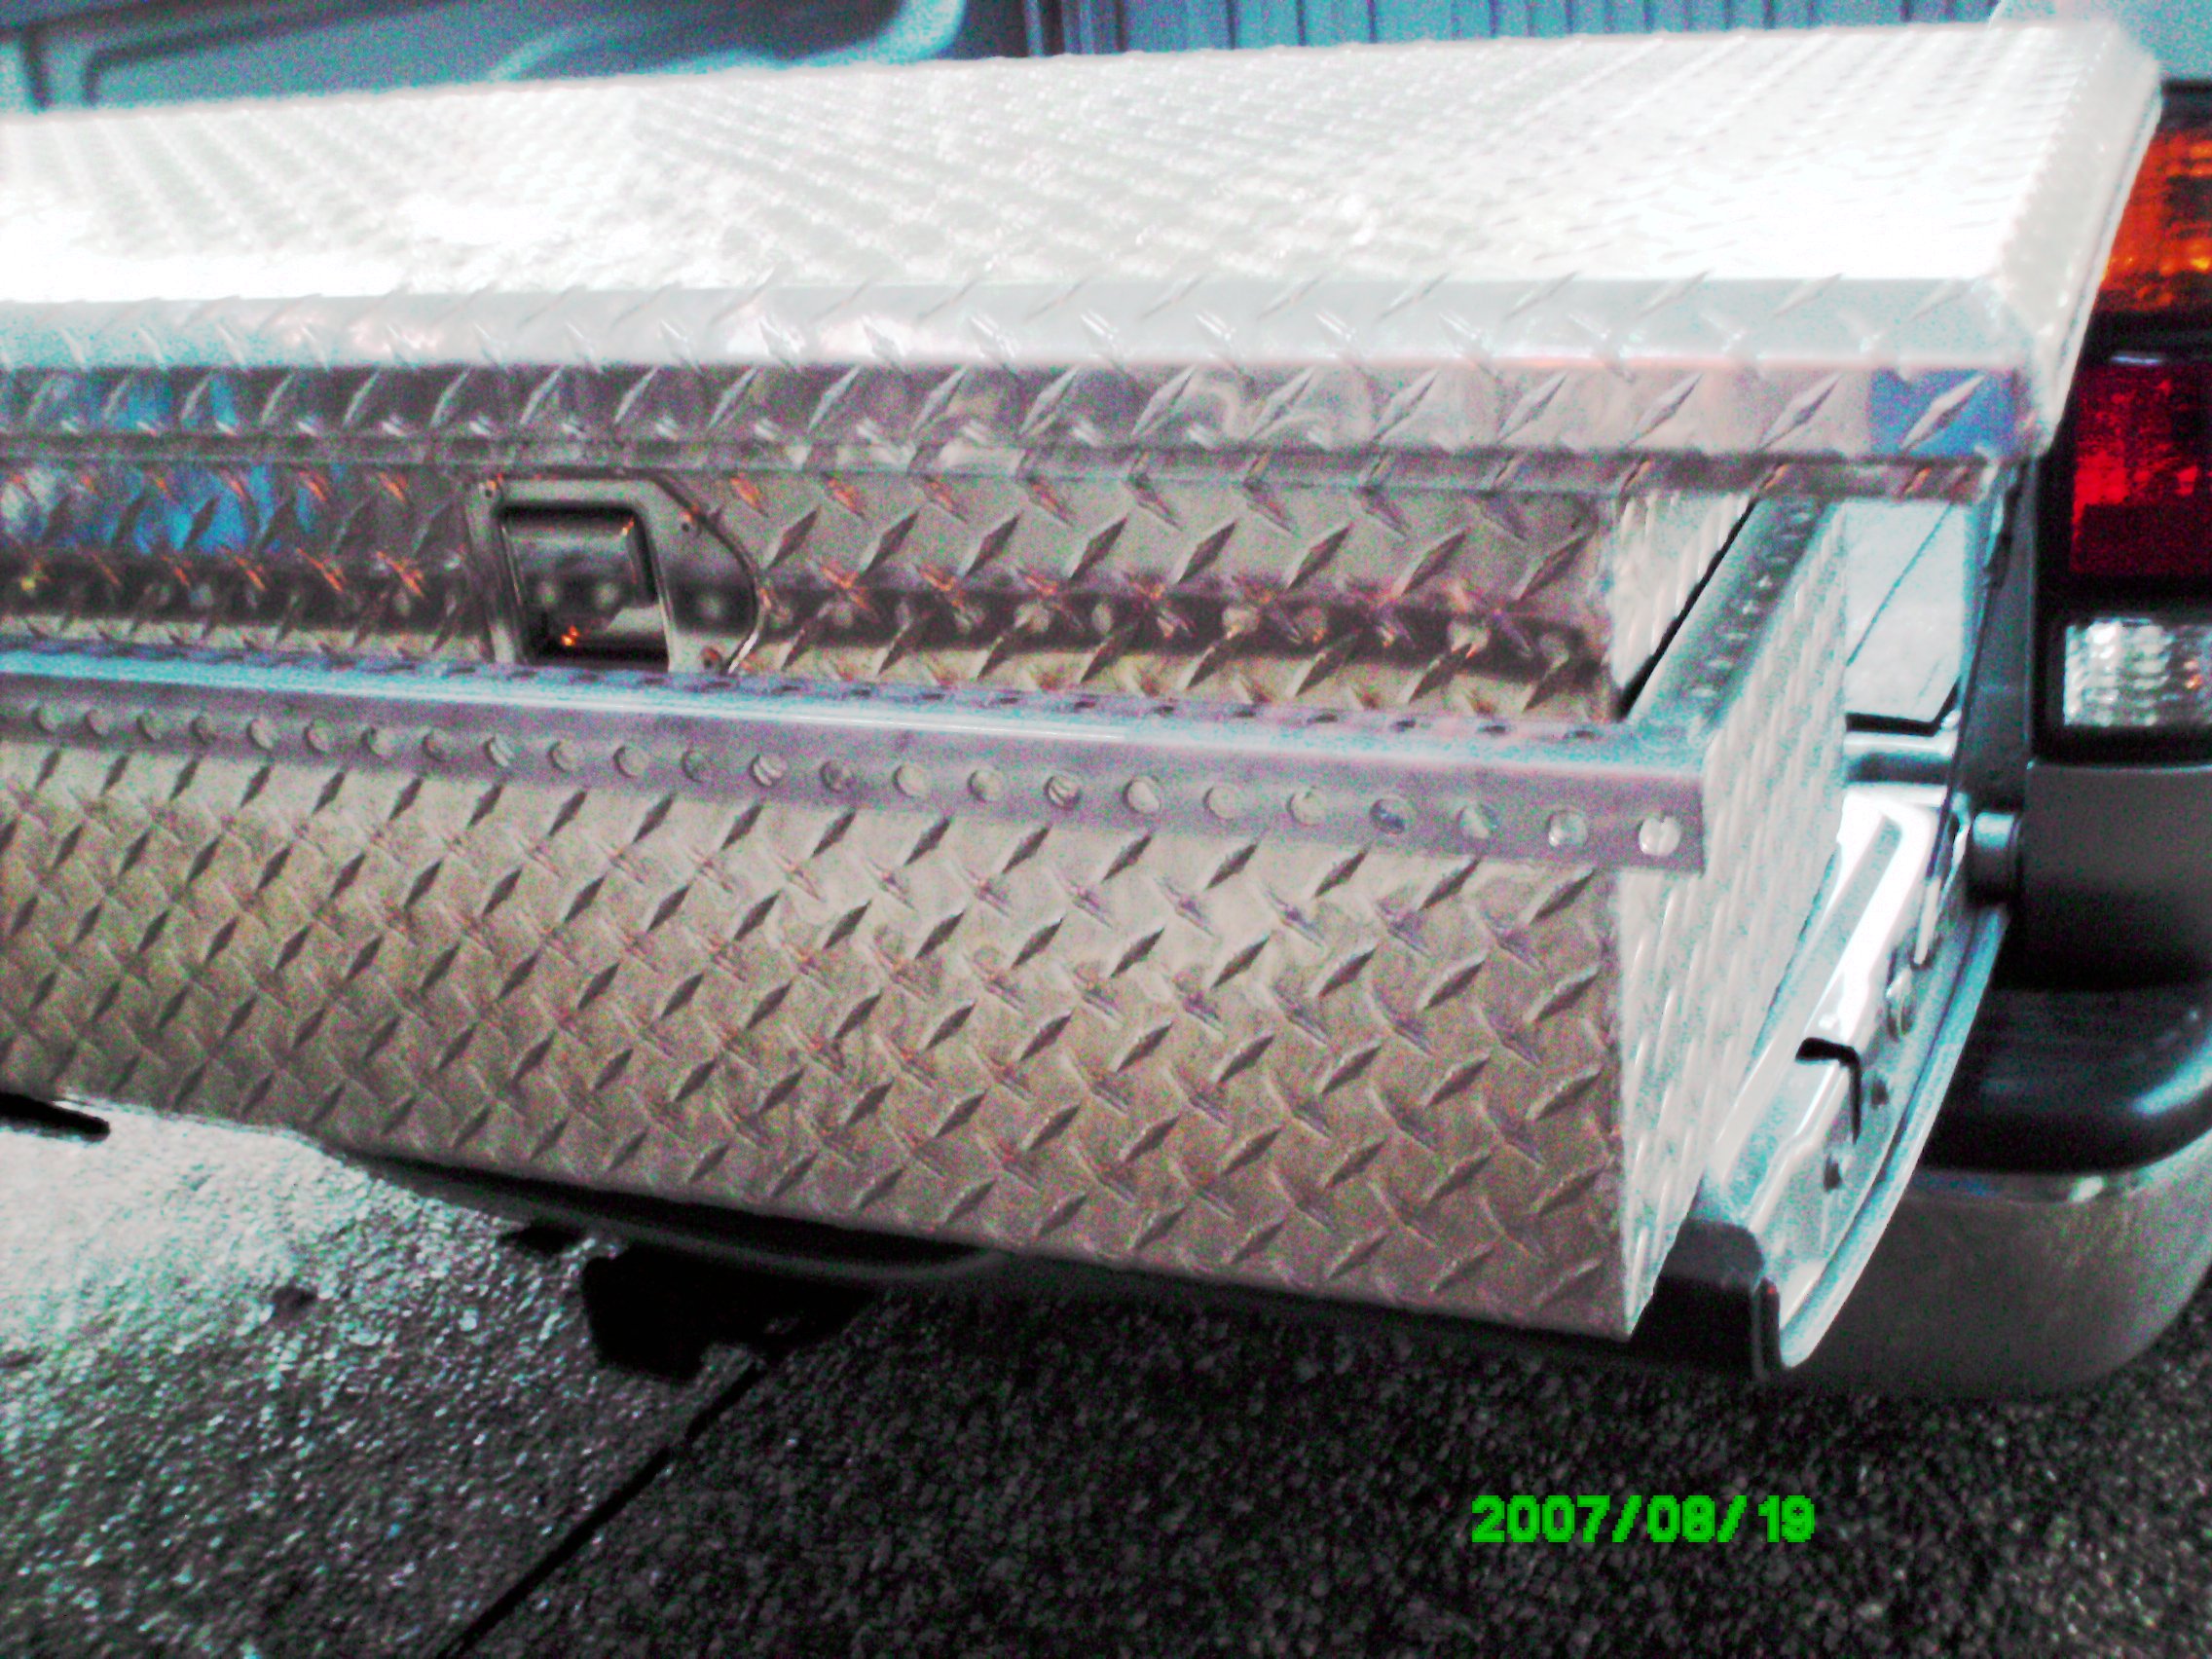
I received an e-mail from Jeff in Austin who was interested in putting a UbiquiRack on his truck to mount his SCUBA tanks. Since he had a lockbox in the bed, we discussed a few options on how best to proceed. Jeff ultimately decided to mount the UbiquiRack directly to his lockbox under the overhang for the sliding shelf and here's how it came out. He even modded my mod by putting a couple tiedown cleats at the ends. Nice work Jeff!

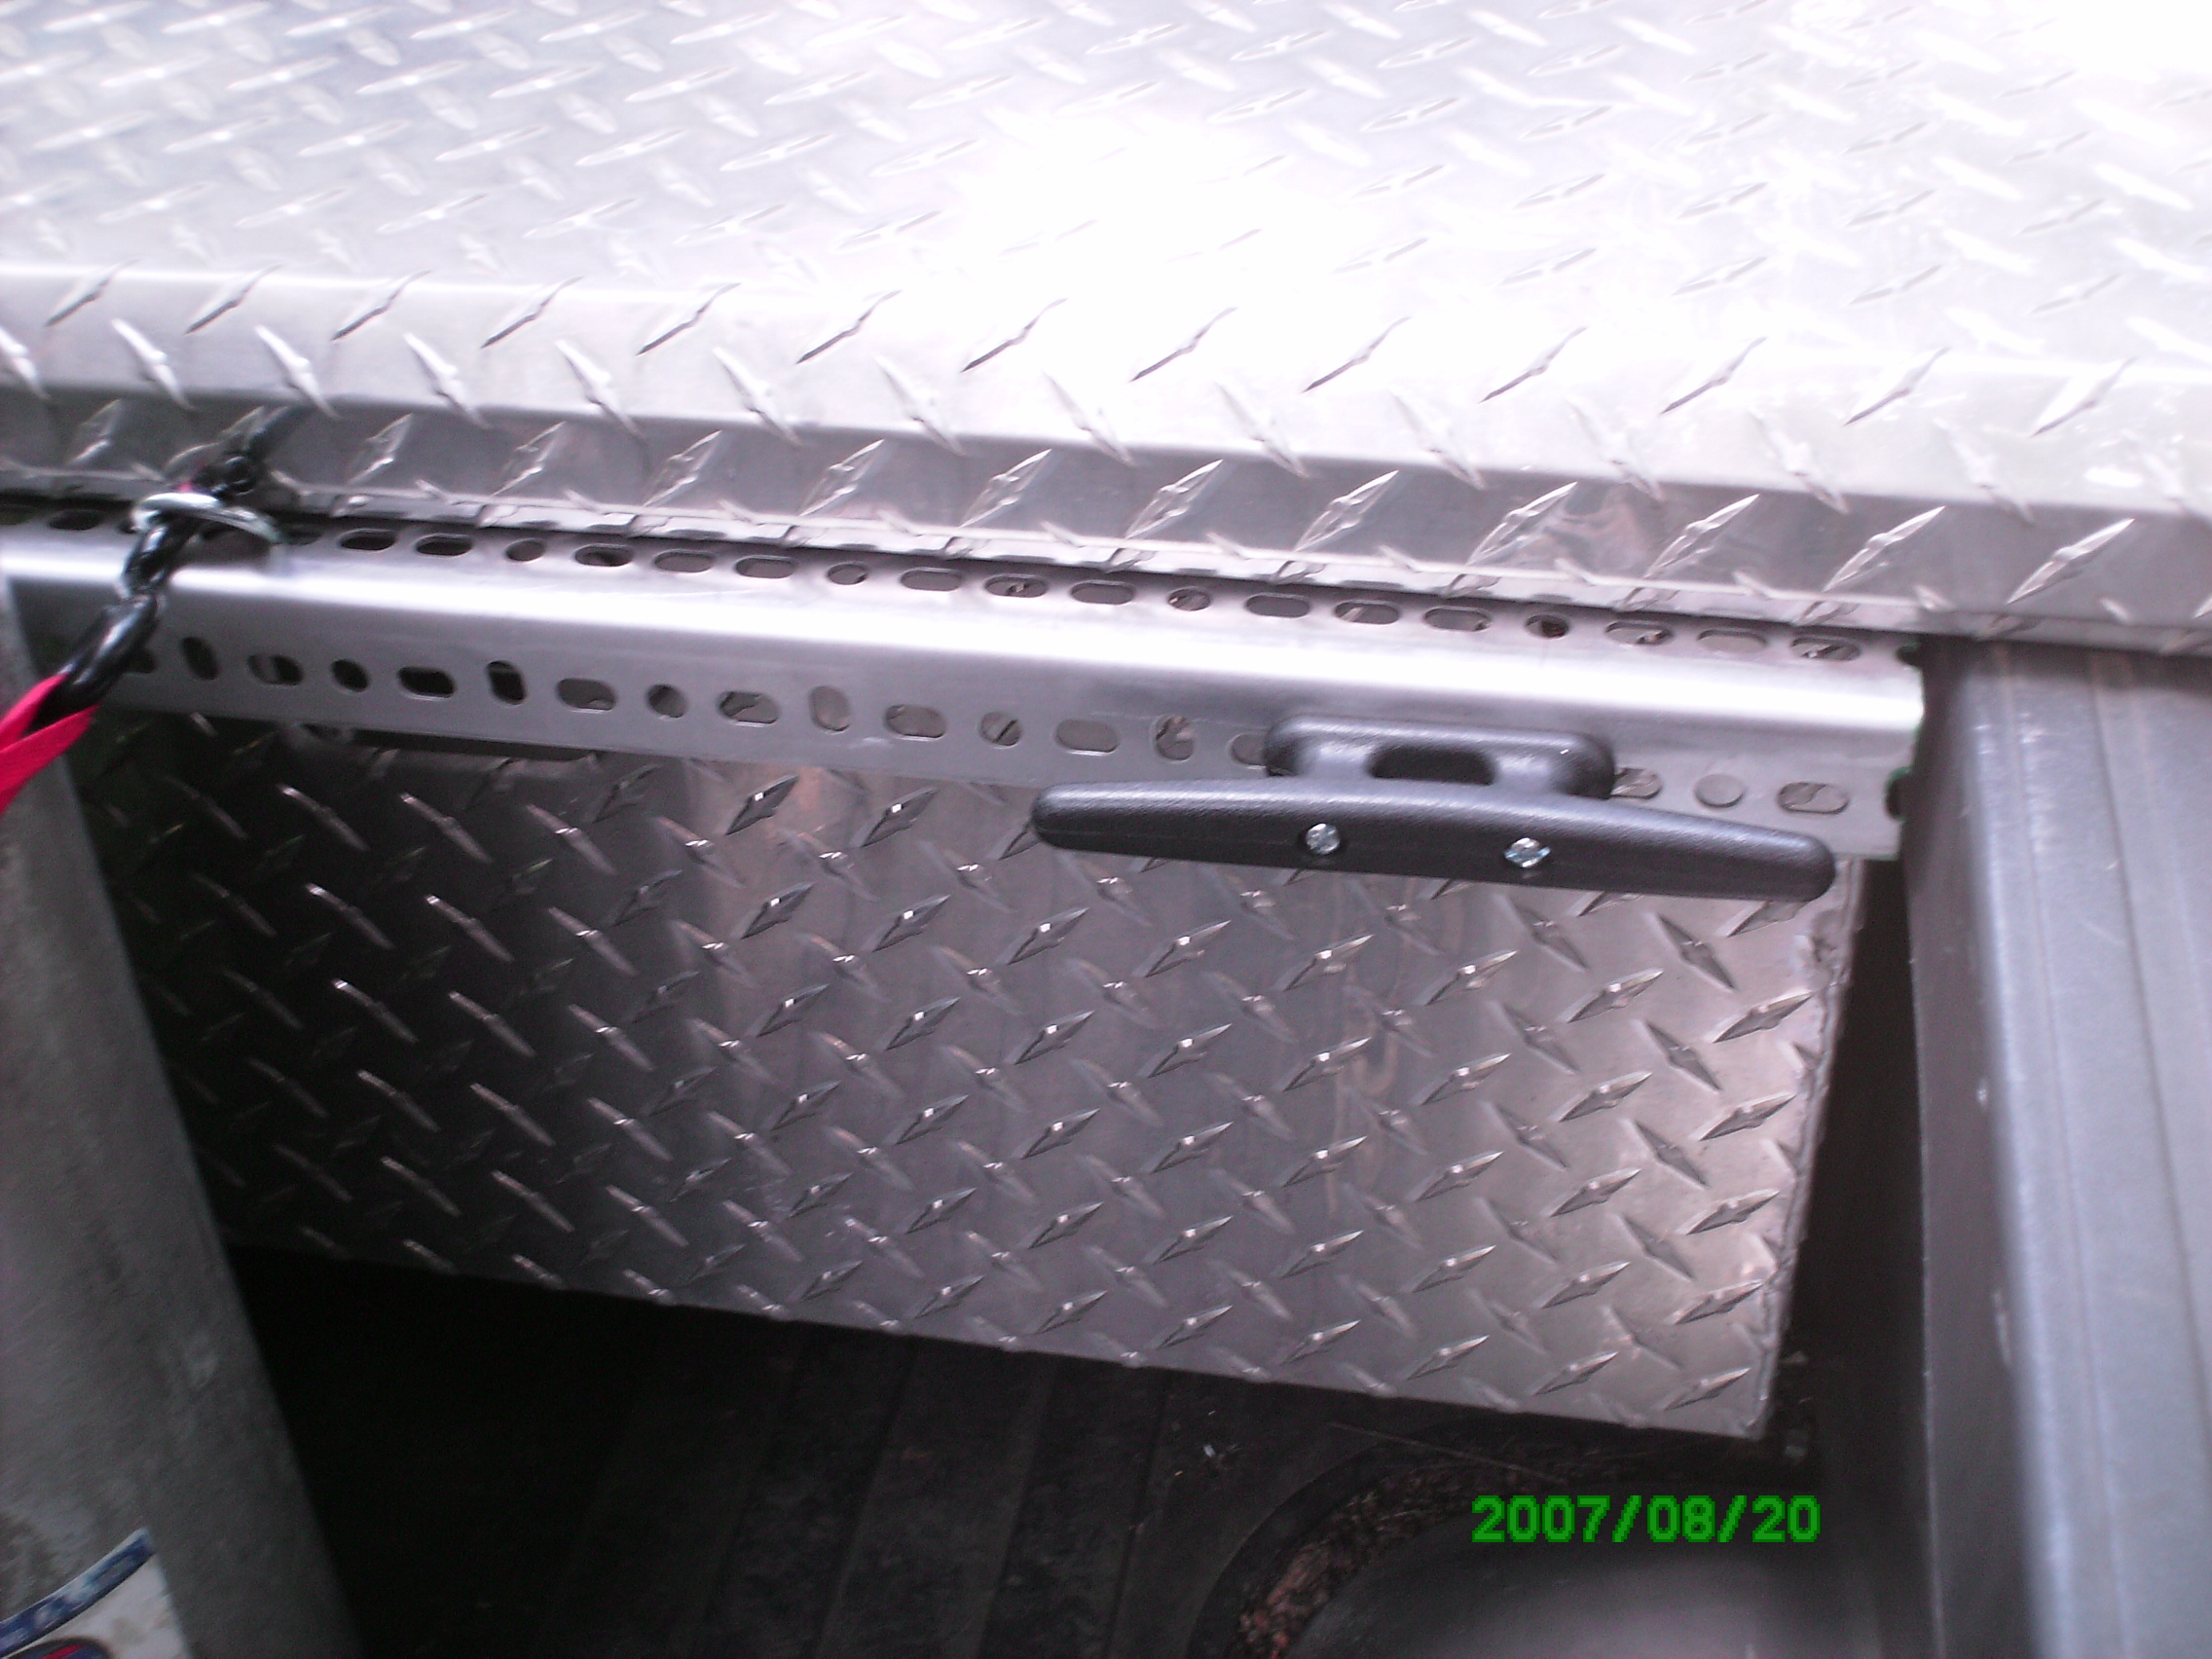
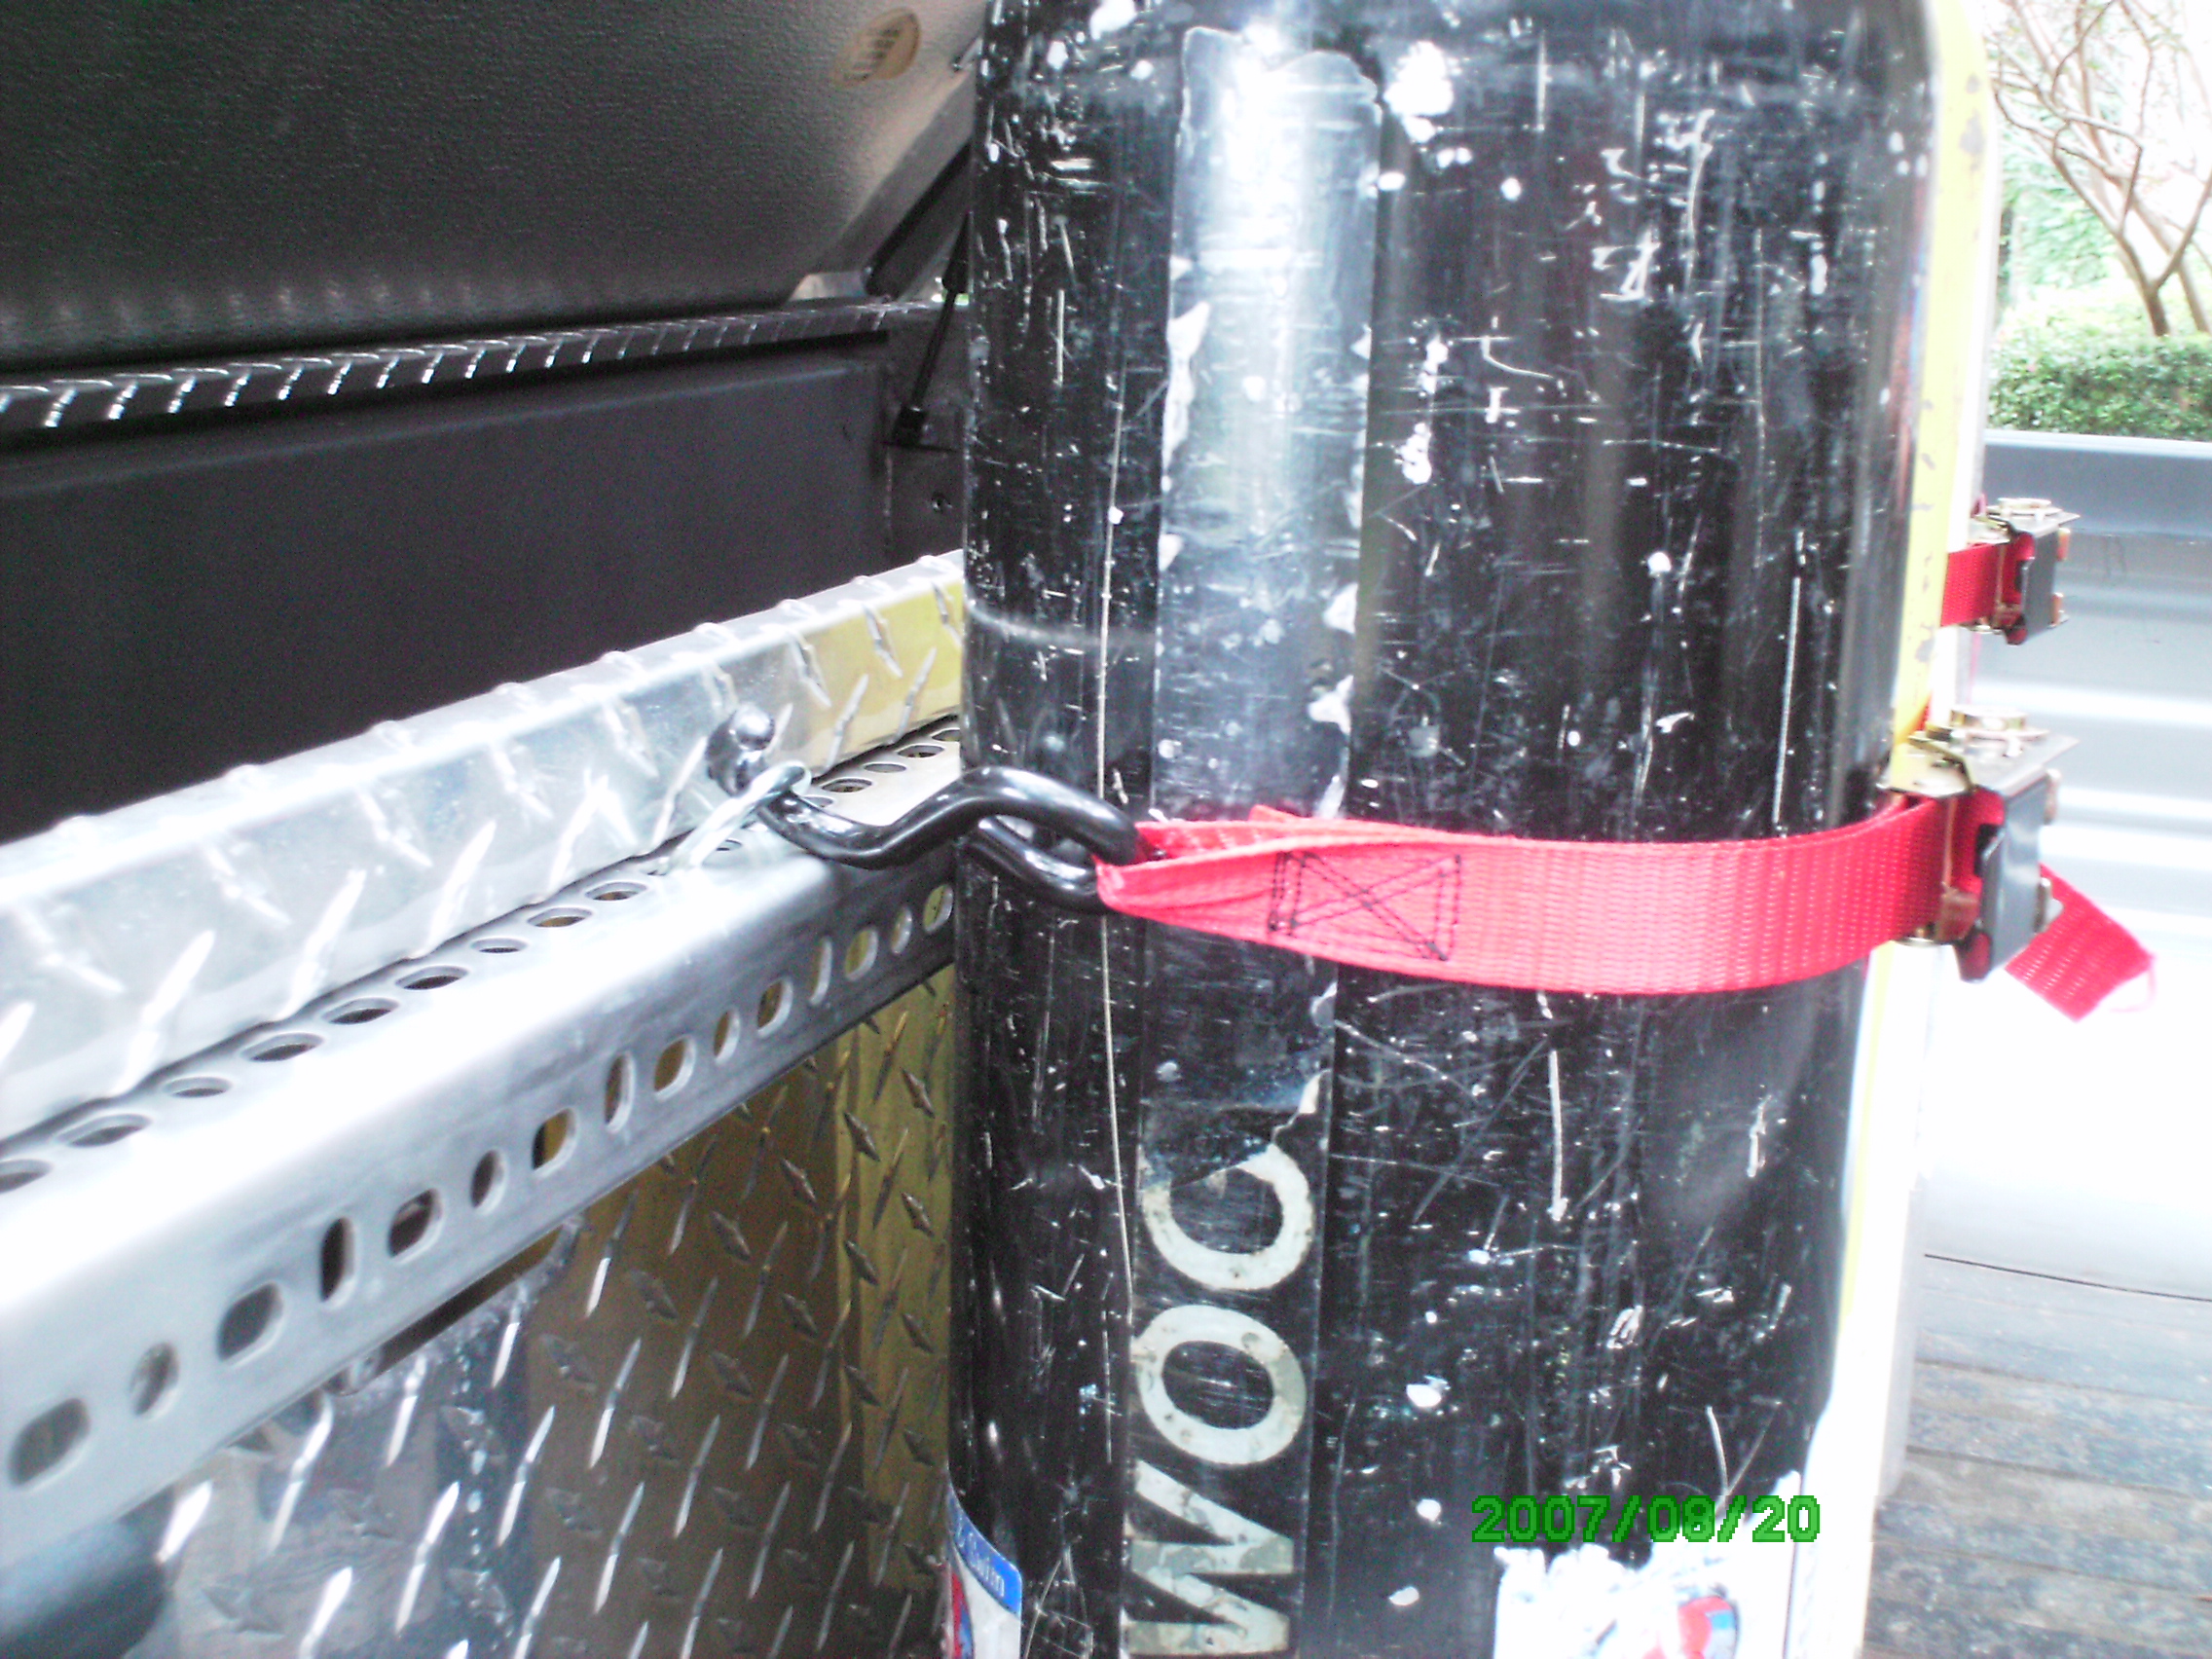
If you look at the last picture above, you can see the inside of the lockbox and a problem where the self-tapping screws piercing the ledge interefere with the sliding tray. Jeff says it was a small price to pay in losing the sliding tray. I came up with a possible solution to get the sliding tray back in place. I'll let you know if Jeff tries it and how it works. Below are a couple more pics Jeff sent. The first is a modified design he tried which didn't work because the Dexion rails on the sides prevented him putting the box back in place. The second is a ring system he's trying rather than u-bolts and him putting yet another cleat on the bottom of the lockbox.

Got comments or suggestions?